
|
|
After you complete the initial thinking about your project’s objectives, it’s time to put together a schedule. When you start a new schedule, you add tasks and organize them efficiently so that the project end date occurs as soon as possible. For more articles in this series of project management instructional guides, see The Project Road Map |
|
Project management tips before you start . . .
|
Step 1: Create a new project
|
Base a new project on a template pre-populated with tasks from projects similar to yours. Many of these templates have been created by industry experts to help you get started. |
|
|
Start with a clean slate and then populate it with tasks, people, and other schedule information. |
|
|
Open a project you already set up and base your current project on it. |
|
|
Open a project you made in an earlier version of Project. |
Step 2: Add tasks
|
Add tasks to a schedule to break the work down into manageable pieces. |
|
|
Set the time span (or calendar time) a task should take. You can enter a number or just type in a placeholder duration like “TBD” or “Talk to Sarah first”. |
|
|
Set the amount of time (or person-hours) for a task to be completed. This is the amount of time regardless of the number of people on the task. |
|
|
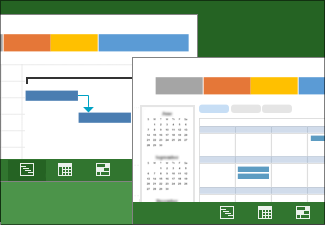
If your tasks are already in Excel, you can copy them from Excel into Project. Project will keep the formatting and organizational structure of the task list. |
|
|
Mark the end of major portions or phases of your project with milestones to show progress toward major deliverables. |
|
|
You can cancel a task but keep a record of it in the project plan. This is a useful way to test how changes could affect your project. |
Step 3: Organize tasks
|
Link any two tasks in a project to show their relationship (also called a task dependency). Linked tasks reflect project realities. When one task changes, so does the other. |
|
|
Show task hierarchy by creating an outline with the Indent and Outdent buttons. |
|
|
When there are interruptions in a task, you can split it into sections to show when it stops and starts. |
|
|
Use Work Breakdown Structure (or WBS) codes to outline tasks numerically so that work matches your business’s accounting practices. |
|
|
Set up the major phases first and then break them down into individual tasks. |
|
|
Learn more about how Project works with tasks and their relationships to help calculate the schedule. |
Step 4: Set up the project calendars
|
Set the standard work days for everyone on your project, such as Monday through Friday, 8 A.M. to 5 P.M. |
|
|
Change people’s work schedules by adding holidays and vacations. |
|
|
Identify working and nonworking time for only one task, such as a computer process that runs by itself during a 24-hour schedule with one day off for maintenance. |
|
|
Learn more about how resource and project calendars work together to help Project calculate the schedule. |
Step 5: Save and publish the schedule
|
Save a local copy of your project as an MPP file. |
|
|
Make your project work available online to other users on Project Web App |
|
|
Save a project to the PDF format that can be read with a PDF reader or on a web page. |
Return to the Project Road Map


