Note: We recommend that you use OneNote from Microsoft 365 on Windows because OneNote for Windows 10 reaches end-of-support in October 2025. You can download OneNote on Windows from the Microsoft Store. When you’re ready, you can change the defaults to point to OneNote instead of OneNote for Windows 10, so that shared notebooks will always open in your preferred version.
A refreshed layout
The OneNote on Windows app was refreshed recently so it feels more modern and familiar with the rest of the Office apps. You can choose to display the notebook and section navigation pane whenever you need them, and then hide them again when you’re done — leaving you to focus on your work, your thoughts, and your ideas.
Navigation pane in OneNote on Windows
The Navigation button (
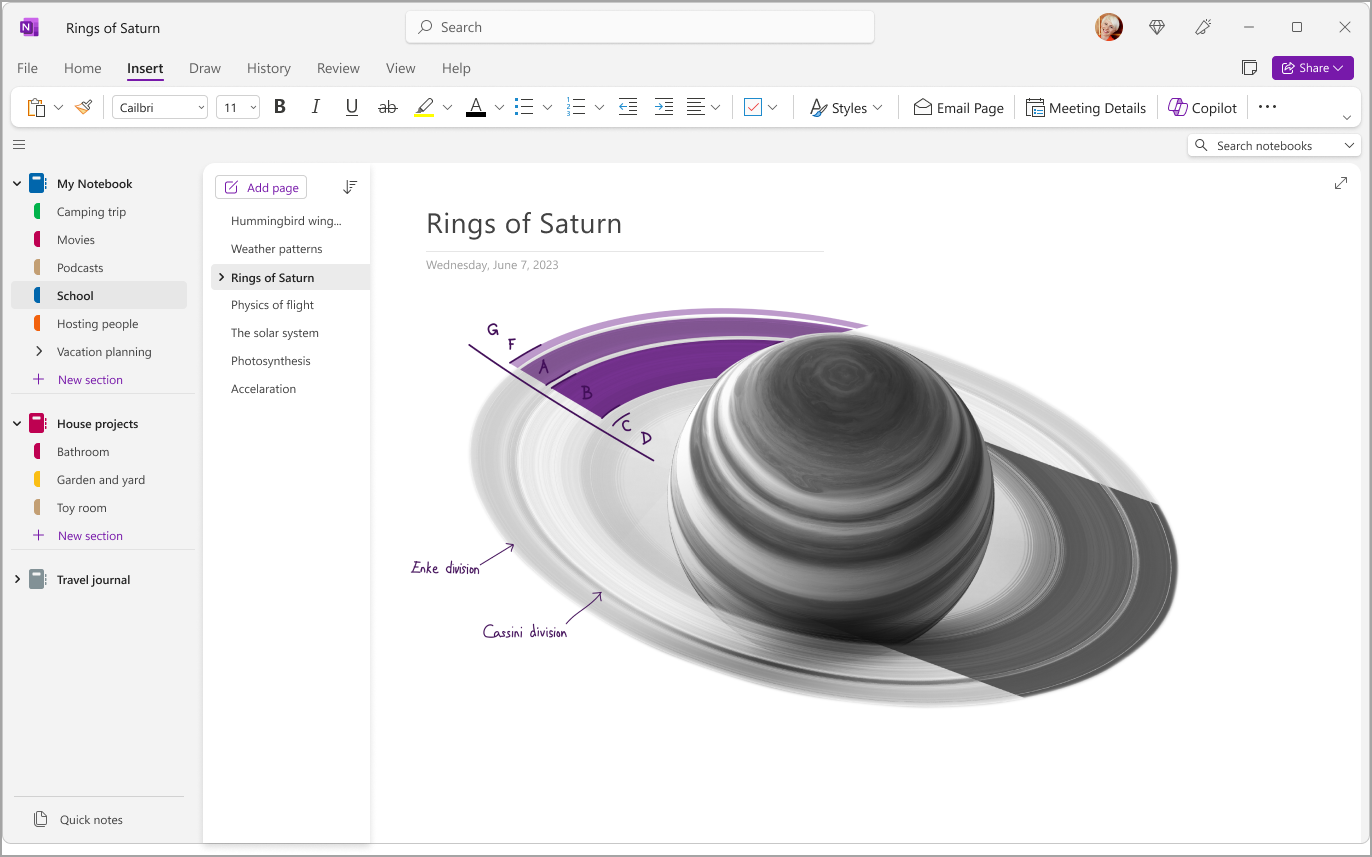
Get quick access to your notebooks, sections, and pages
To view the sections of your current notebook, select Navigation (
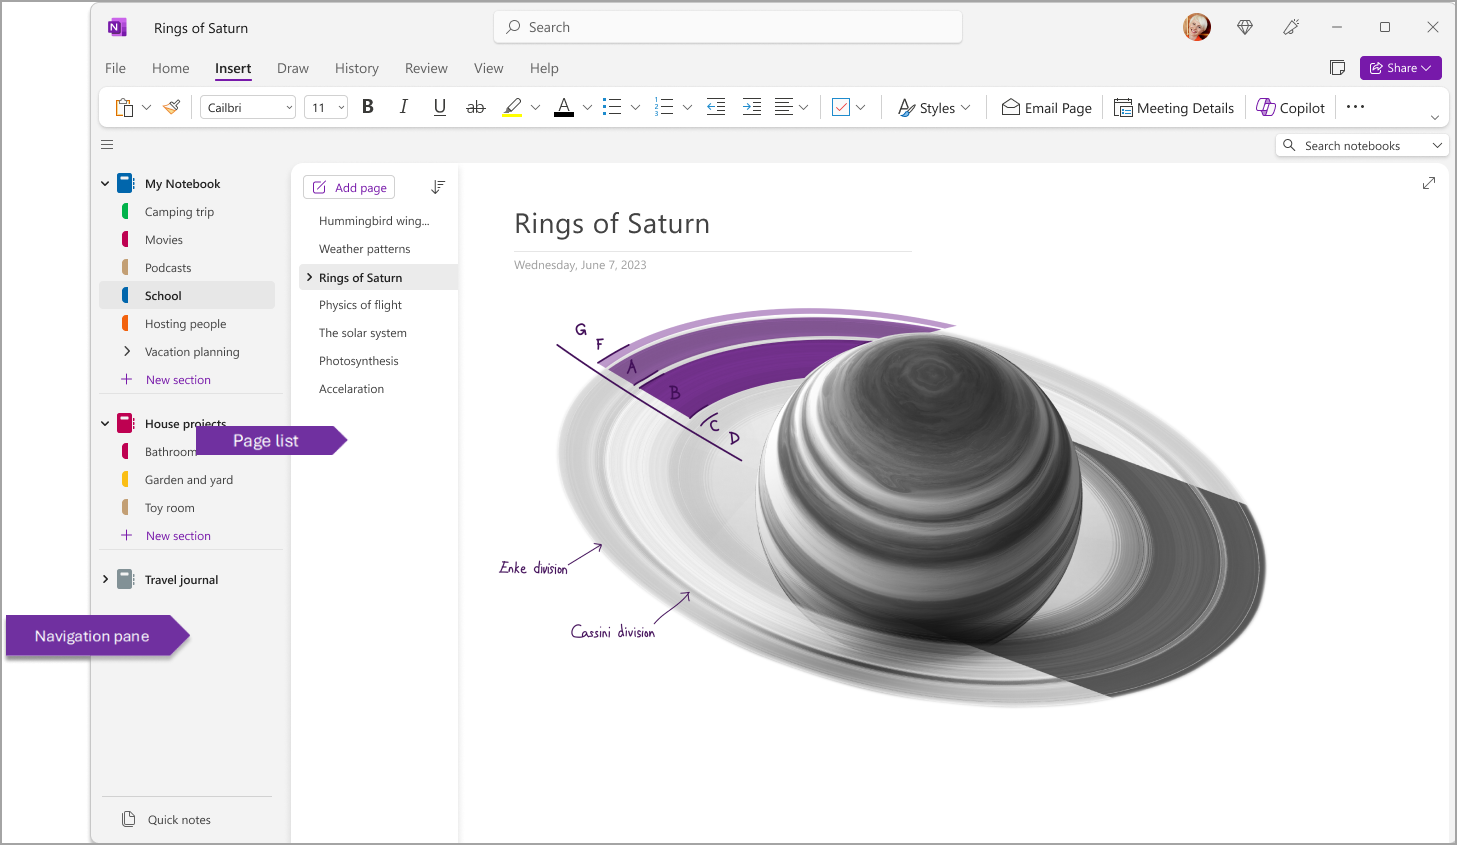
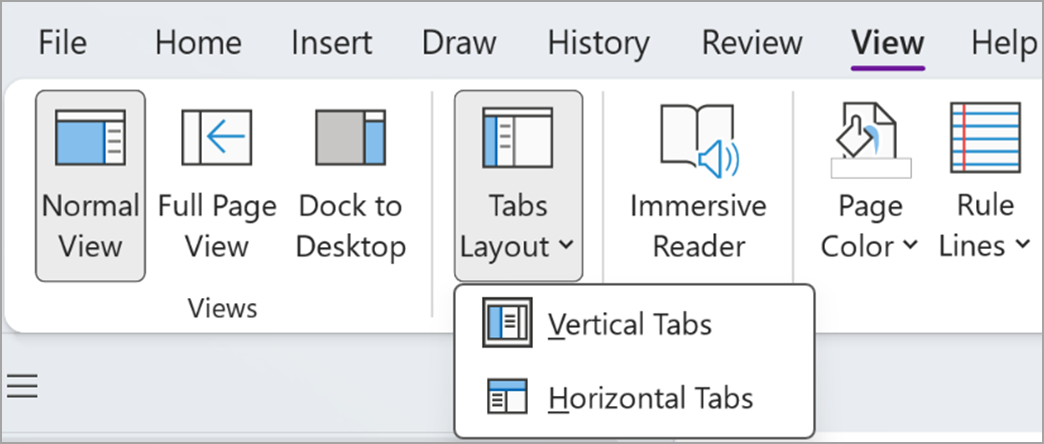
You can also customize these panes by going to View > Tabs Layout > Horizontal Tabs to have the sections displayed as headers at the top of the page.
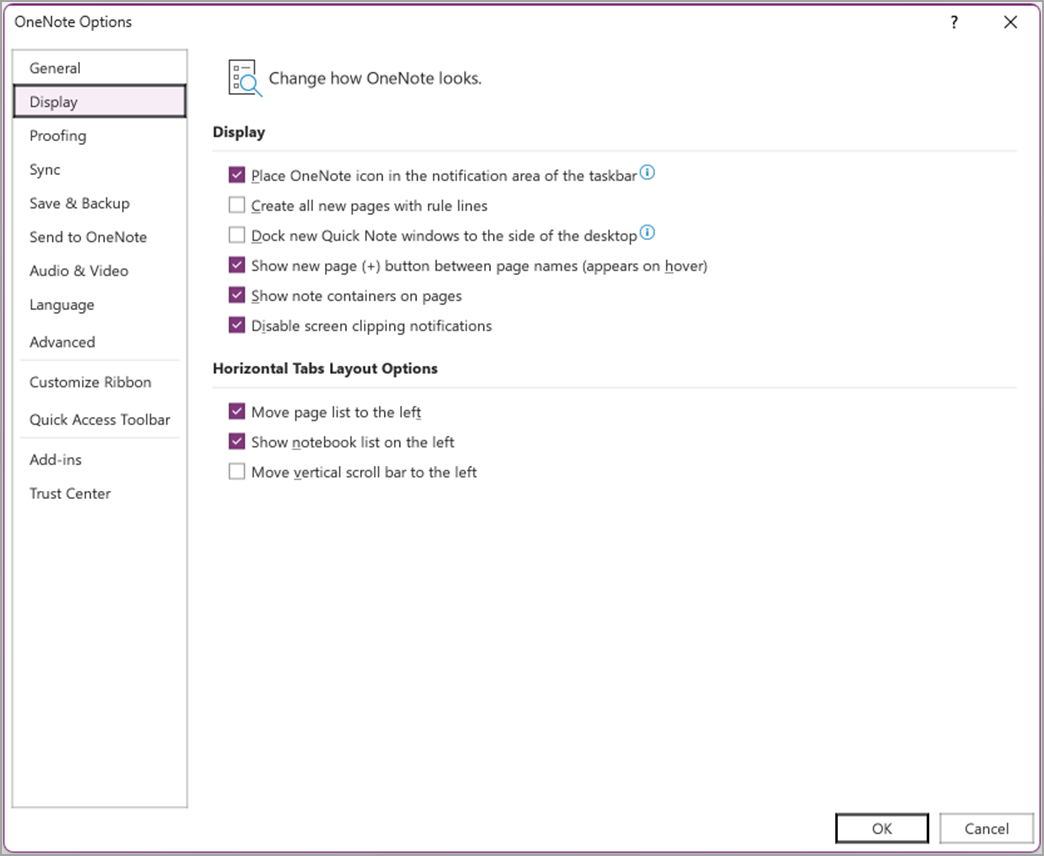
Once you switch to Horizontal Tabs, you can choose to pin the page list to the left or to the right of your screen by going to File > OneNote Options > Display and change the Move page list to the left option.
To view a different section, click the title in the navigation pane.
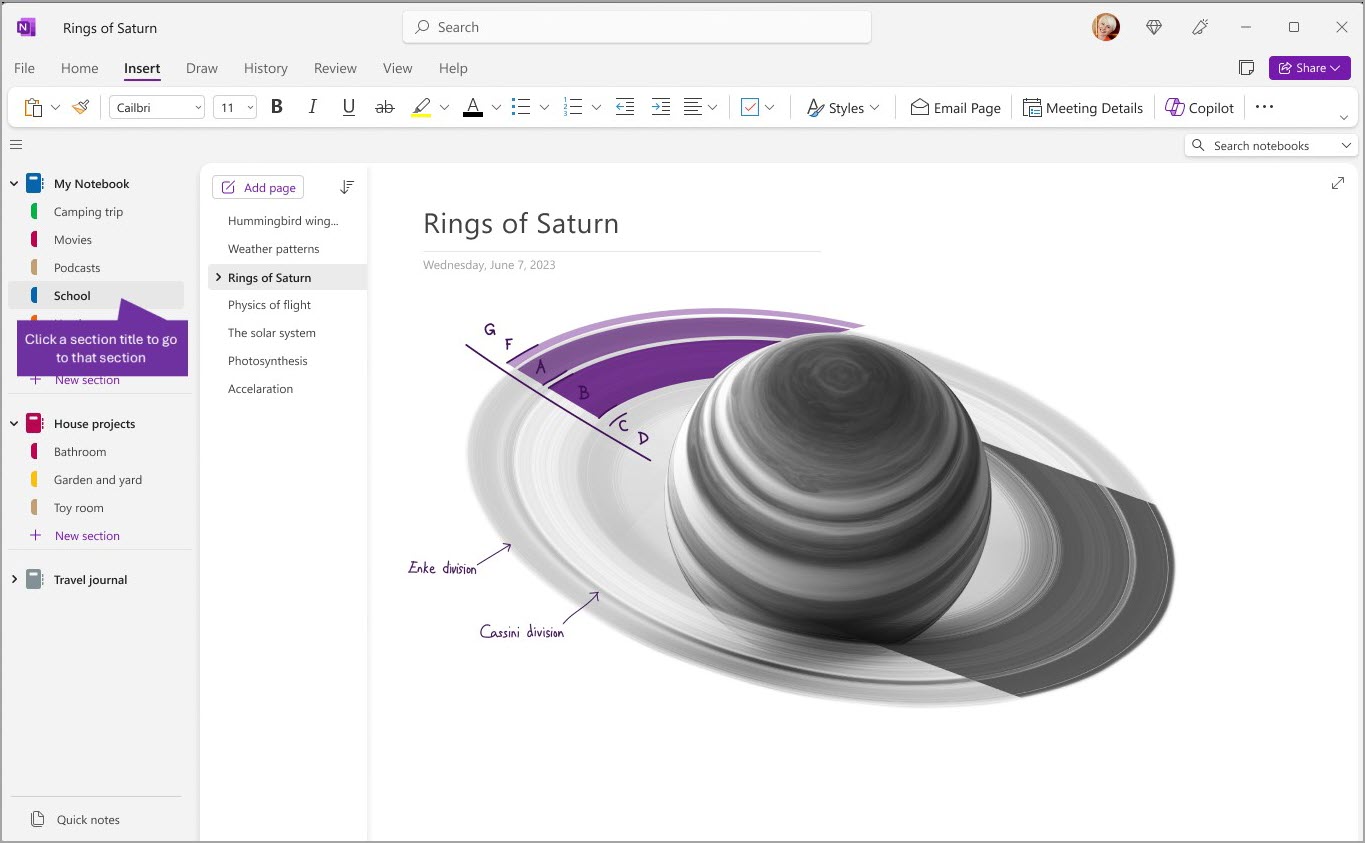
To choose a different page, click the title in the page list.
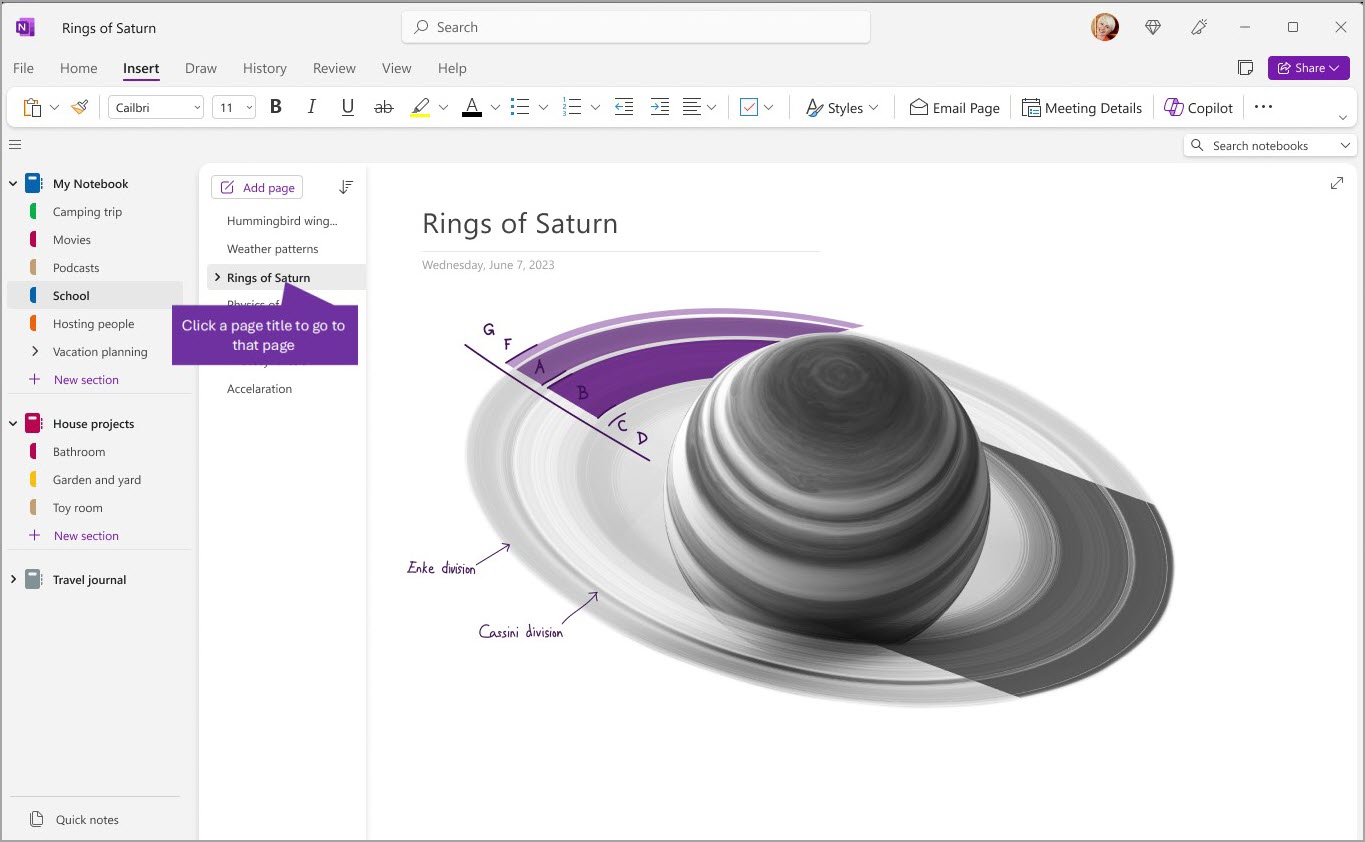
If you’ve previously used OneNote on your computer or device, it will open the last notebook and page that you last worked in.
Tip: You can right-click any page or section title and then choose from more options on the menu that appears.
To switch to a different notebook that you’ve previously opened, select the Navigation button (
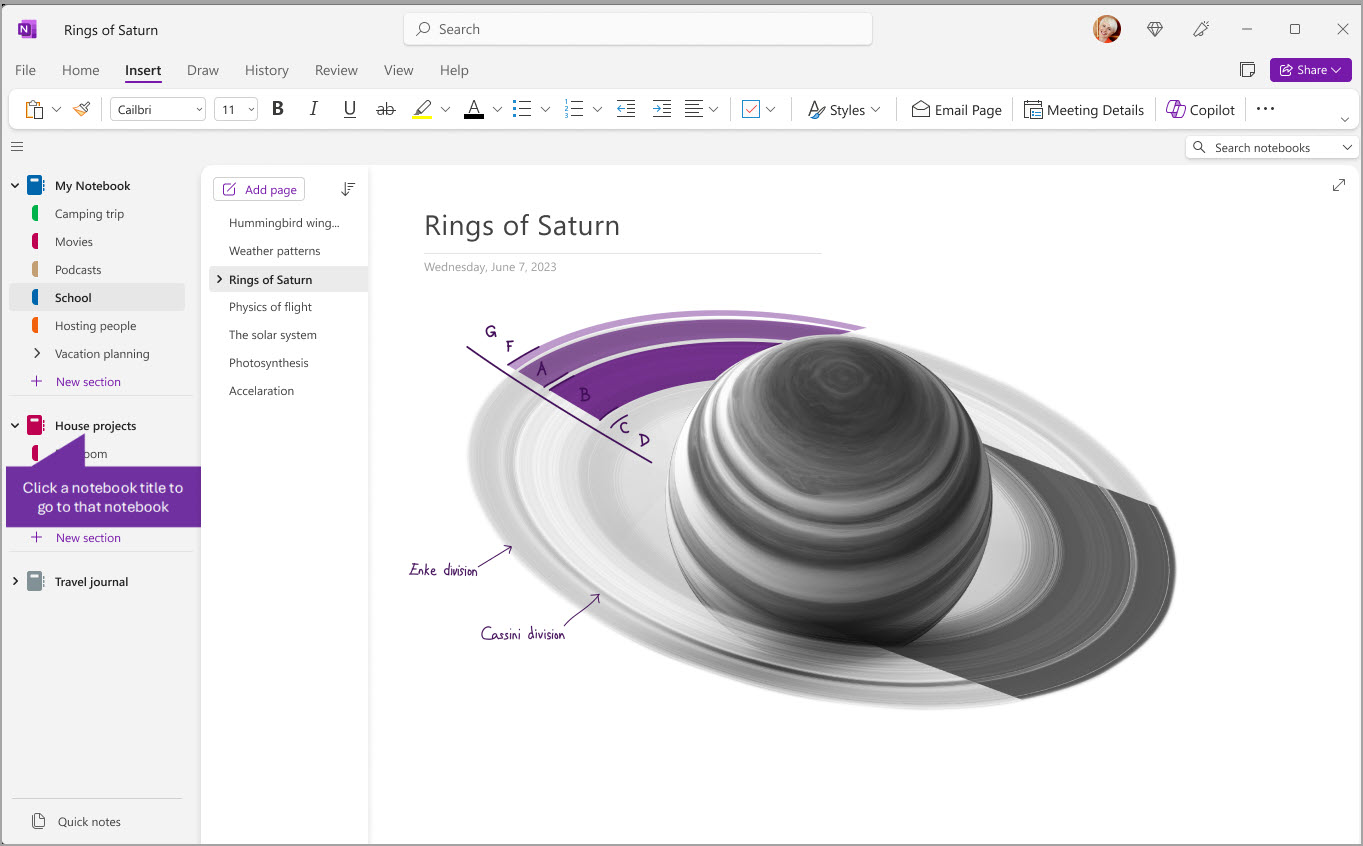
Add new sections, pages, and notebooks
In OneNote, your notebooks never run out of pages. You can easily add more pages or sections to any notebook — and you can add new notebooks to separate your content by your subjects and projects, or by the locations in which you take notes (for example, at home, at school, or at work).
Start by selecting the Navigation button (
-
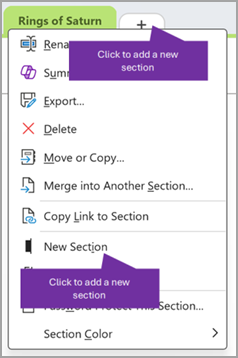
To create a new section in the current notebook, select the New Section button at the bottom of the section list. If your sections are displayed horizontally at the top, click on + or right click then choose New Section to add a new section.
-
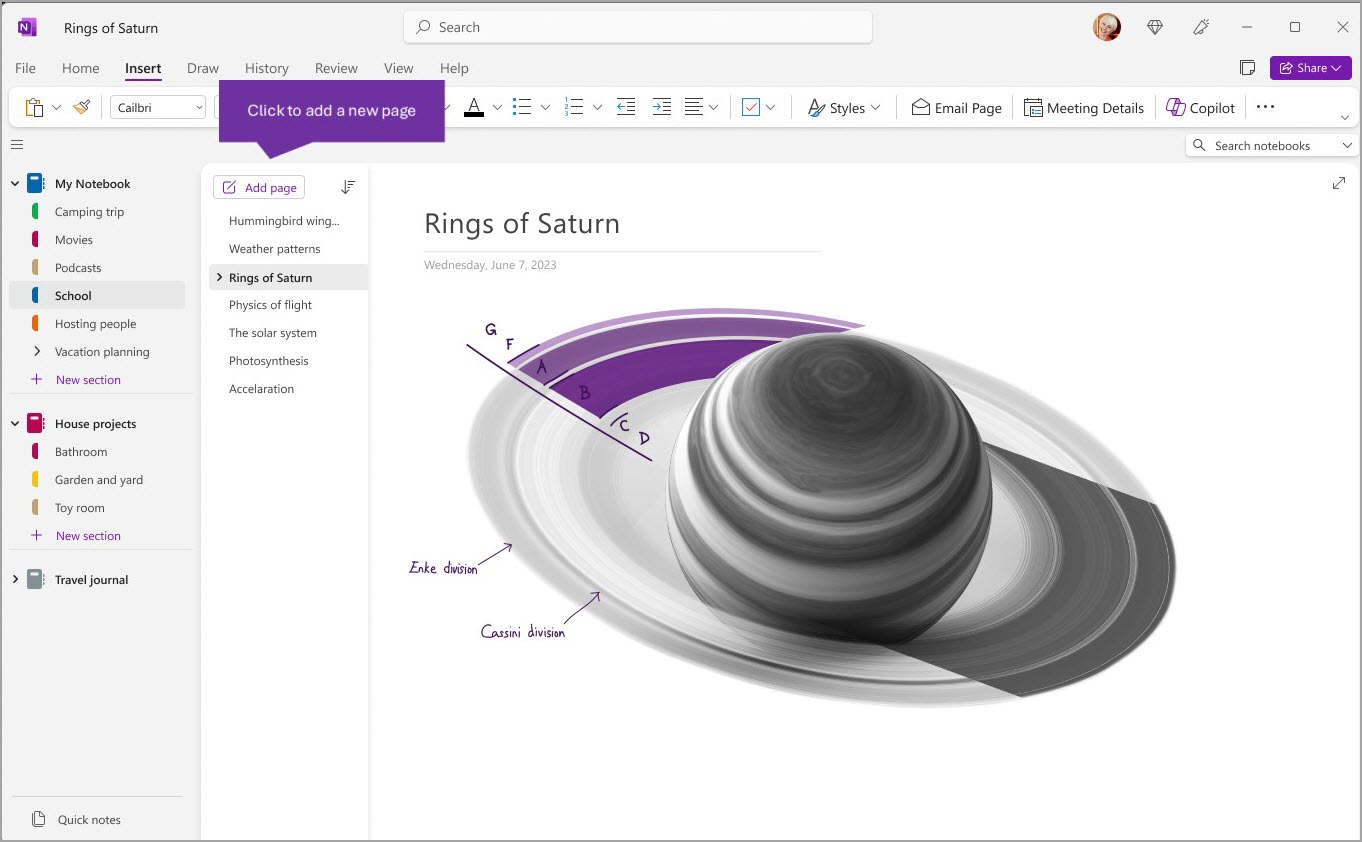
To create a new page in the current section, select the Add Page button at the top of the page list. Or use the + option that appears on mouse over to insert a new page in that location.
-
To create a new notebook, select File > New to display the New Notebook options.
Make navigation panes as wide or as narrow as you want
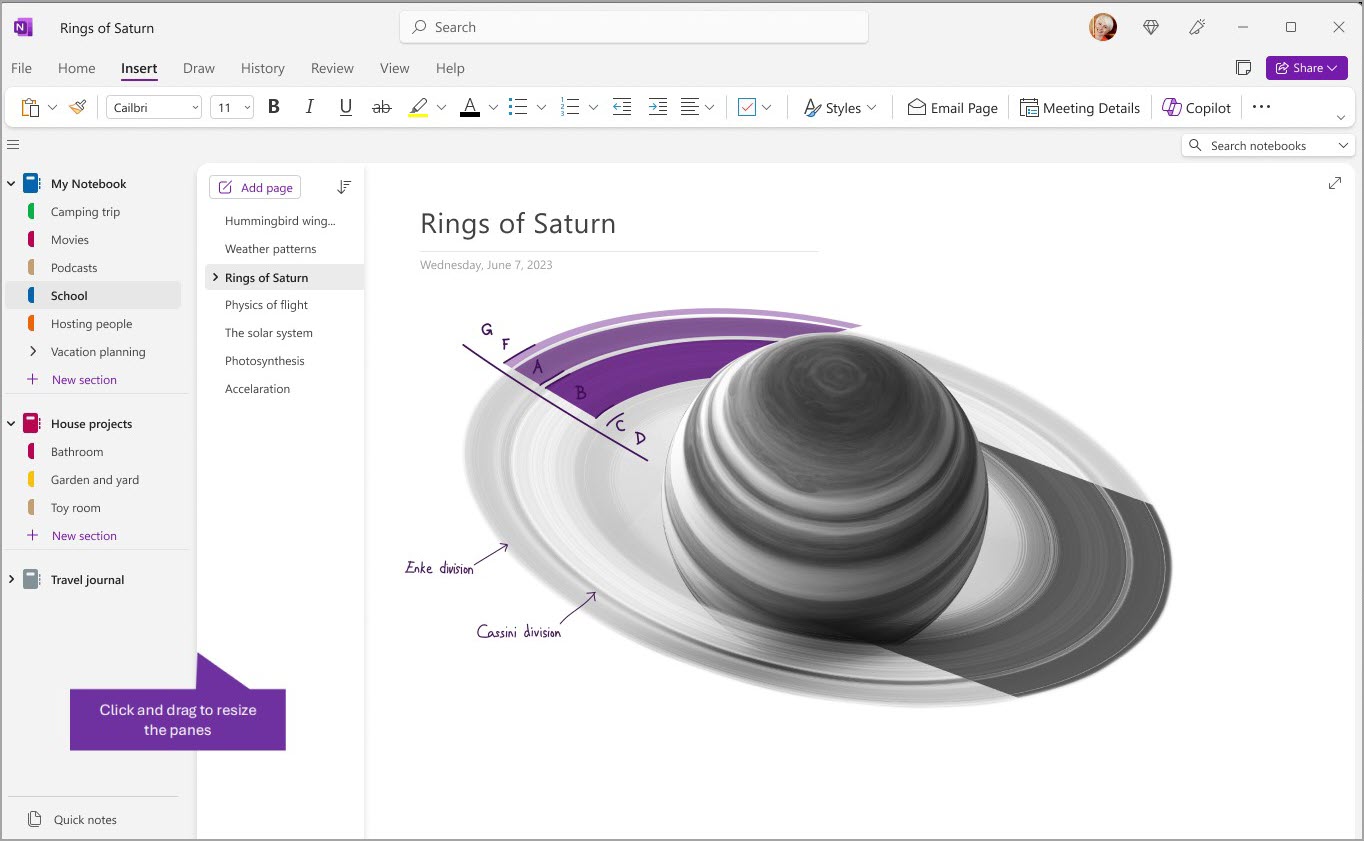
You can easily resize the navigation panes to make them wider or narrower. This is useful if your section and page titles frequently appear truncated, or if you want to maximize your note-taking space while the navigation pane is shown.
-
Move the mouse pointer over the vertical edge to the right of the navigation pane that you want to resize.
-
When a double-headed arrow pointer appears, click and drag the edge of the pane to the left or right to make it as wide as you want, and then release the mouse button.
Find your notes instantly, no matter where you’ve put them
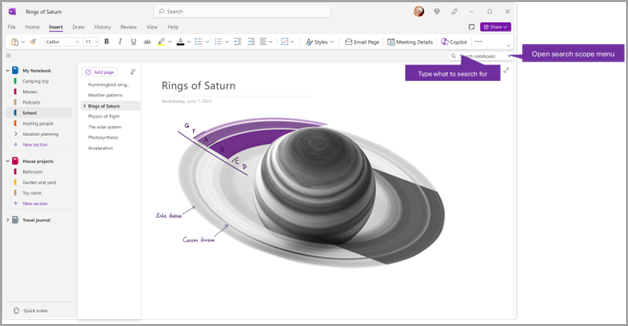
OneNote’s best-kept secret is its ability to instantly search the entire contents of any notebook — or even all of your notebooks. Start by clicking into the search box near the right side of the screen and start typing.
-
In the search box, type a keyword or a phrase to search for.
Tip: You can use quotation marks around a phrase that you type into the search box. Doing so finds all occurrences of that exact phrase instead of the individual words.
-
By default, OneNote will search for the text you entered in All Notebooks that you currently have open. However, you can set the search scope to only search in This Section, This Section Group, This Notebook or Find on this Page. You can save the selection as the default search scope as well.
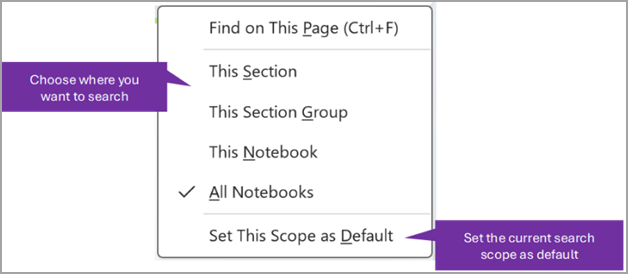
Tip: By pressing Ctrl+F, the scope of the search box will be set to Find on this Page so it is a shortcut you can use to quickly find content on the current page.
-
If your search text was found, it will appear in the search results list. Click any result that you want to view and OneNote will jump that page. When you’re finished reviewing search results, click the X button to close the navigation and return to your current page or click on the page to close the search results.
Using multiple accounts
OneNote on Windows users can stay signed in with multiple personal, work, or school accounts and navigate between their notebooks with ease.
To view or change the accounts you use with OneNote on Windows, click on the account switcher at the top right corner of the app window. Verify that the account you want appears in the list of accounts that opens, or select Add an account if you want to add a new account.
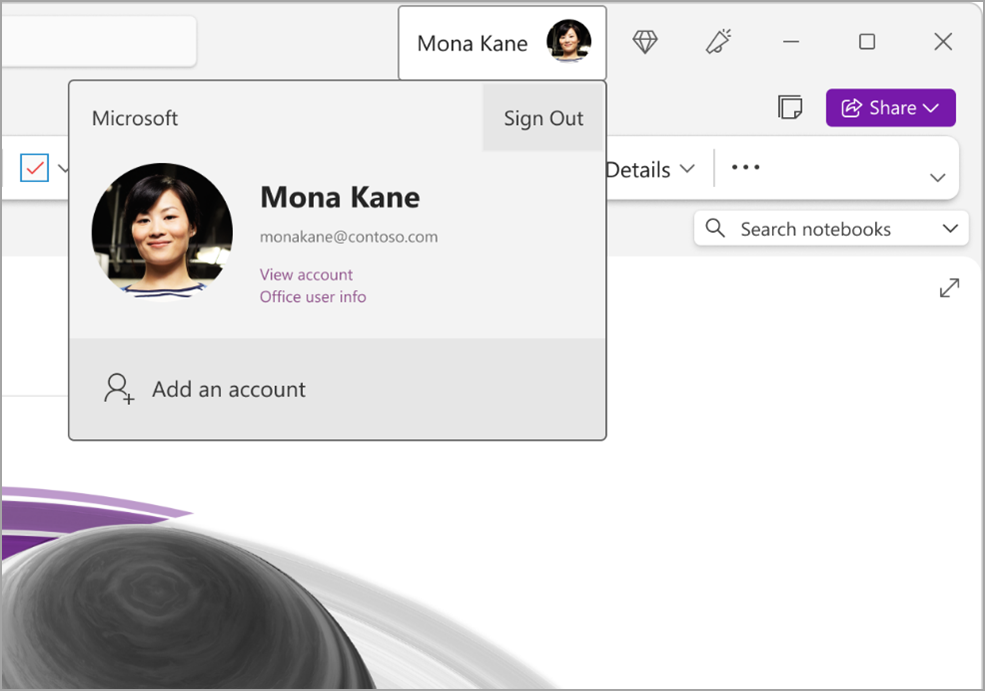
To remove an account that you no longer want to use with OneNote, click on the … for that account in the list, and then select Sign Out. Note this doesn’t automatically close the notebooks from that account. We recommend removing them from your Notebooks list. To do this, right-click the name of a notebook you want to close from the navigation pane, and then select Close Notebook.
Customize OneNote with your app preferences
You can easily customize your OneNote experience by choosing from the available setting options. Select File at the top left corner, then Options.
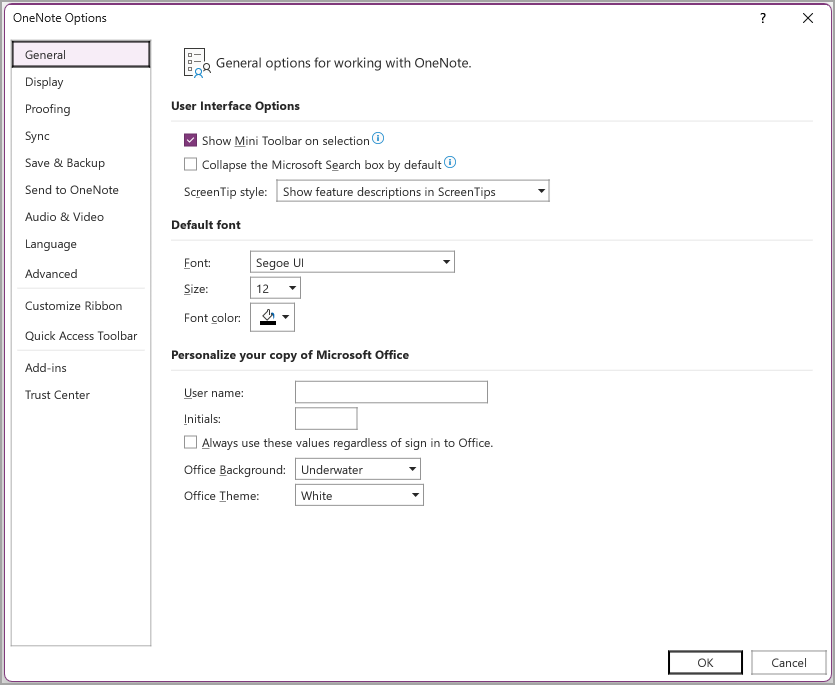
A simpler layout — with more room for your notes
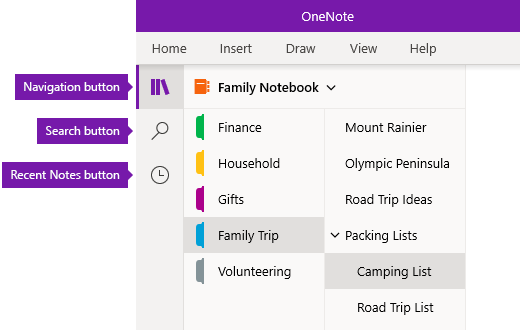
The OneNote app window in the Windows and Mac versions offers more note-taking space by providing an easier way to control the navigation interface. You can choose to display the notebook, section, and page navigation panes whenever you need them, and then hide them again when you’re done — leaving you to focus on your work, your thoughts, and your ideas.
-
The Navigation button toggles the navigation panes on (


-
The Search button provides an entry point to search for keywords and phrases in specific places in your notes — or across all of your notebooks. Besides text, you can also search for any tags that you’ve applied to selected notes. Click any search result in the list to jump to its location in your notes.
-
The Recent Notes button displays a chronological list of pages that you’ve recently viewed or edited, as well as the sections and notebooks they’re found in. This is helpful when you need to quickly switch back and forth between pages in different sections or different notebooks, or when you want to quickly continue taking notes on a different computer or device.
Tip: The Recent Notes button is currently only available in OneNote for Windows 10. However, if you’re using OneNote for Mac, you can easily browse and open recent notes by clicking File > Open Recent on the menu bar.
Get quick access to your notebooks, sections, and pages
If you’ve previously used OneNote on your computer or device, it will open the last notebook and page that you last worked in.
To view the hierarchy of your current notebook, click the Navigation button 
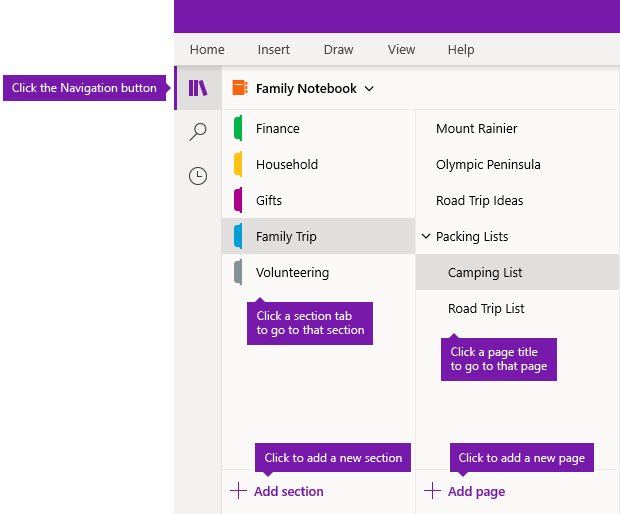
Tip: You can right-click (Windows) or Control-click (Mac) any page or section title and then choose from more options on the menu that appears.
To switch to a different notebook that you’ve previously opened, click the Notebooks dropdown arrow that appears above the section and page lists.
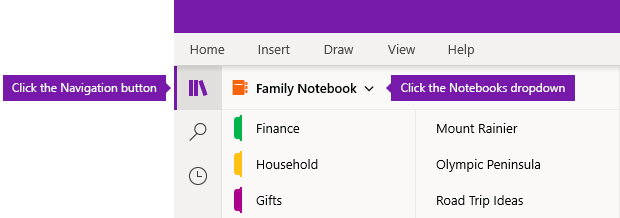
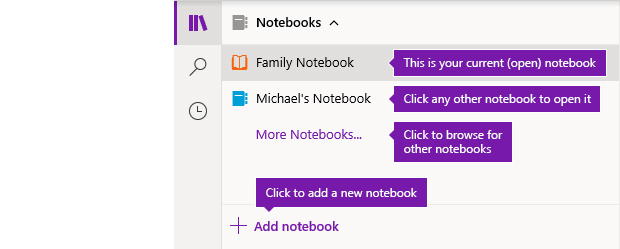
In the Notebooks list that appears, click the name of the notebook you want to open. If no other notebooks are shown in the list, or you’re not seeing the notebook you want, click More Notebooks to open any additional notebooks that are available in the cloud account with which you’re currently signed into OneNote.
Tip: If the notebook you want is on a different account, see Switch between your home, work, or school accounts later in this article.
Add new sections, pages, and notebooks
In OneNote, your notebooks never run out of space. You can easily add more pages or sections to any notebook — and you can add new notebooks to separate your work by your subjects and projects, or by the locations in which you take notes (for example, at home, at school, or at work).
Start by clicking the Navigation button 
-
To create a new section in the current notebook, click the Add section button at the bottom of the section list.
-
To create a new page in the current section, click the Add page button at the bottom of the page list.
-
To create a new notebook, click the Notebooks dropdown arrow that appears above the section and page lists. In the Notebooks list that appears, click the Add notebook button.
Note: OneNote for Mac users can also use the File > New commands on the menu bar to create new sections, pages, and notebooks. In addition, both OneNote for Mac and OneNote for Windows 10 let you create new items by using keyboard shortcuts. For more information, see the related links at the end of this article.
Make navigation panes as wide or as narrow as you want
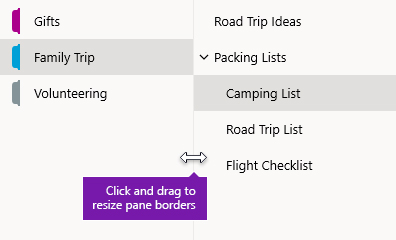
You can easily resize the navigation panes to make them wider or more narrow. This is useful if your section and page titles frequently appear truncated, or if you want to maximize your note-taking space while the navigation bars are shown.
-
Move the mouse pointer over the vertical edge to the right of the navigation pane that you want to resize.
-
When a double-headed arrow pointer appears, click and drag the edge of the pane to the left or right to make it as wide as you want, and then release the mouse button.
Find your notes instantly, no matter where you’ve put them
OneNote’s best-kept secret is its ability to instantly search the entire contents of any notebook — or even all of your notebooks.
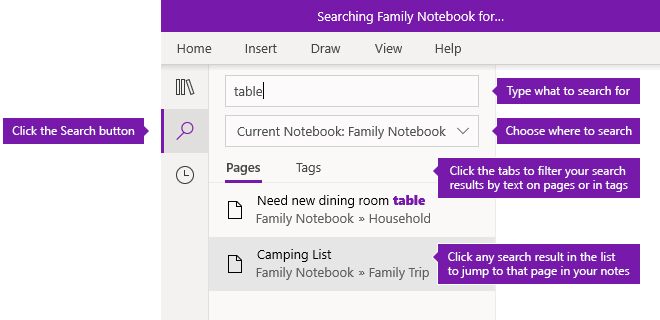
Start by clicking the Search button to display the search pane, and then do any of the following:
-
In the search box at the top, type a keyword or a phrase to search for. If you’ve searched for something similar before, you may see suggestions of Recent Searches that you can click again.
Tip: In any version of OneNote, you can use quotation marks around a phrase that you type into the search box. Doing so finds all occurrences of that exact phrase instead of the individual words.
-
By default, OneNote will search for the text you entered in All Notebooks that you currently have open. However, you can set the search scope to only search in only the Current Notebook, in only the Current Section, or on only the Current Page. In OneNote for Windows 10, click the list dropdown arrow under the search box to select your search scope. In OneNote for Mac, click the funnel icon, and then select the search scope from the menu that appears.
-
Underneath the search box and search scope selection, click Pages to see search results found in the text of your notes, or click Tags to search only within the descriptive text of note tags you’ve applied to selected notes (for example, “Important” or “Question”).
-
If your search text was found, it will appear in the search results list. Click any result that you want to view and OneNote will jump that page. When you’re finished reviewing search results, click the Search button again to close the navigation and return to your current page.
Tip: Not finding what you’re looking for? Make sure you’ve signed into the correct account and then open the notebooks that you want to search on that account. For more information, see Switch between your home, work, or school accounts in the section immediately below.
Switch between your home, work, or school accounts
For a notebook to appear in your Notebooks list, or for its pages to show up in notebook search results, you must be signed into the account that contains that notebook, and you need to have opened that notebook at least once. If the notebook you want is not stored on the cloud account that you’re currently signed in with, you’ll need to either add or switch to a different account.
OneNote for Windows 10 users can stay signed in with multiple personal, work, or school accounts and navigate between their notebooks with ease.
-
To view or change the accounts you use with OneNote for Windows 10, click the Settings and More button

-
To remove an account that you no longer want to use with OneNote, click to select that account in the list, and then click Sign Out. To prevent opening such notebooks again, we recommend removing them from your Notebooks list. To do this, right-click the name of a notebook you want to close, and then click Close Notebook.
Tip: To switch accounts in OneNote for Mac, click OneNote > Sign Out on the menu bar to sign out of your current account, and then click OneNote > Sign In to sign into the account you want.
Customize OneNote with your app preferences
Whether you use OneNote on a PC or on a Mac, you can easily customize your OneNote experience by choosing from available app preferences.
-
In OneNote for Windows 10, click the Settings and More button

-
In OneNote for Mac, click OneNote on the menu bar, and then click Preferences.


