
Tasks in Outlook on the web are powered by Microsoft To Do.
A task is an item that you create that you want to track until it's completed. Tasks can be created from an email that you've flagged for follow-up as an actionable item, or they can be to-do list entries that you add manually. Use tasks in Outlook on the web to create, edit, categorize, and manage tasks.
Note: Microsoft To Do is not available in some sovereign cloud environments.
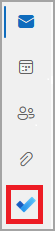
To view and manage your tasks, select 
The To Do page includes four default tasks lists, plus optional tasks lists and any tasks lists that you create.
-
My Day is a Smart List that can help you track the tasks that you want to get done today. It's empty at the start of each day by default, so that you can organize your day by adding tasks to it. You add existing tasks to My Day by right-clicking a task and choosing Add to My Day, or by dragging a task from any other tasks list to My Day. Tasks that appear in My Day are kept in their original list.
Note: My Day is cleared at midnight every night. Tasks that appear in My Day are stored in other tasks lists, so they aren't deleted when My Day is cleared.
-
Suggestions are tasks that aren't completed that you might want to add to My Day. To see suggested tasks, go to My Day, then select

-
-
Important is a Smart List that includes tasks that you've marked as important. You can mark a task as important by right-clicking it and selecting Mark as important, or by selecting the star icon next to it.
-
Planned is a Smart List that includes tasks that have a reminder or due date and have not been marked as complete. Tasks that you create with a reminder or due date will automatically appear in this list. The only way to add tasks to this list is to assign a reminder or due date to an existing task.
-
Tasks is the list where new tasks are stored by default.
-
Flagged Email is an optional list. When on, messages that you've flagged in Mail are copied to the Flagged Email list as tasks. You can turn the Flagged Email list on or off by going to To Do, then selecting

-
Assigned to Me is another optional list. When on, items that have been assigned to you in Microsoft Planner will appear in Assigned to Me. To turn Assigned to me on or off, go to To Do and select
You can add new tasks by selecting a tasks list, then choosing the plus sign next to Add a task and entering a description of your task. If you add a task to a Smart List, the task will be saved in Tasks and linked to the Smart List you were in when you created it.
Note: You can't create new tasks in Planned. To add a task to Planned, add a reminder or due date to an existing or new task.
Select a task in any list to see all of the available options for that task. You can do things like add additional steps, add them to My Day, make them repeating, add a due date or reminder, and add a note.
You can add one or more files to a task.
-
Select
-
Select the task you want to add a file to.
-
Choose Add a file from the task details pane.
-
Browse to and select the file you want to add.
Note: You can attach more than one file to a task, but can add them only one at a time.
Use the My Day pane to create a task from a message.
Note: The To Do experience in the My Day pane is not available in some sovereign cloud environments.
-
Go to Mail in Outlook on the web.
-
Open the My Day pane by selecting

-
Find the message that you want to create a task from in the message list.
-
Select and drag the message to the To Do tab in the My Day pane.
Use the My Day pane to create an event in your calendar from a task.
Note: The To Do experience in the My Day pane is not available in some sovereign cloud environments.
-
Go to Calendar in Outlook on the web.
-
Open the My Day pane by selecting
-
Find the task that you want to create a calendar event from.
-
Select and drag the task from My Day to when you want it on your calendar.
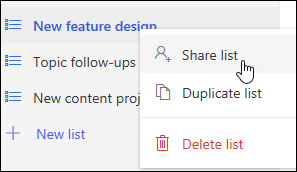
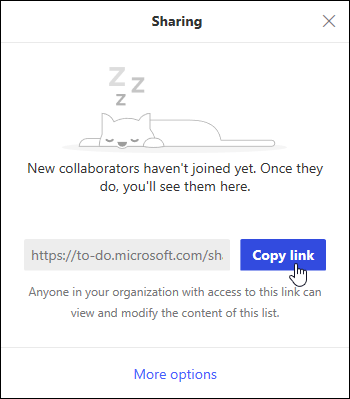
You can't share individual tasks, but you can share tasks lists that you create.
-
Go to To Do.
-
Right-click the tasks list you want to share and select Share list.
-
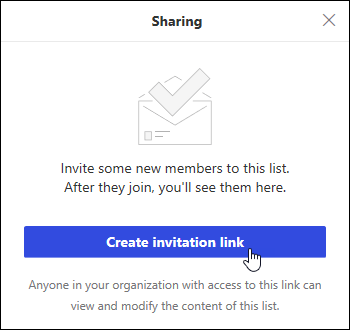
Select Create invitation link.
-
Select Copy link.
-
Go to Mail and create a new message. Address it to the people you want to share the list with, paste the link in the body of the message and add any information you want, then send the message.
Note: You can send the link to anyone, but only people in your organization will be able to connect to the shared list.
After you've shared a tasks list, you can right-click it and select Sharing options to get the invitation link again. Select Sharing options then More options to stop sharing the list, or prevent people who haven't already joined the list from joining.
Tip: You can identify shared lists by the shared icon 
In addition to the default tasks lists, you can create and manage lists to organize your tasks into.
-
Create a new tasks list.
-
Select New list in the navigation pane.

-
Enter a name for your new list.
-
Press Enter to save your new list.
-
-
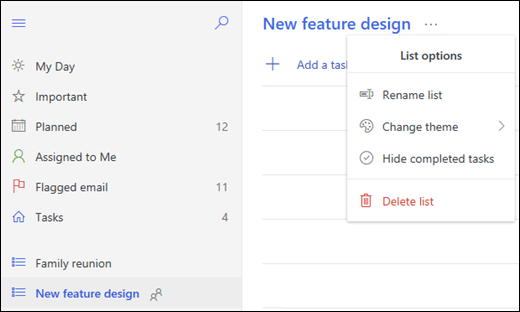
Right-click a list in the navigation pane to Share, Duplicate, or Delete it.
-
Select a list, then select the more actions

Settings for To Do are on their own page. From the To Do page, select
You can switch back to the classic Tasks by selecting The new Outlook toggle at the top of the To Do page.
If you've switched to classic Tasks, you can switch back by selecting the Try the new Outlook toggle at the top of the Mail page.
-
Select Tasks at the bottom of the page.
-
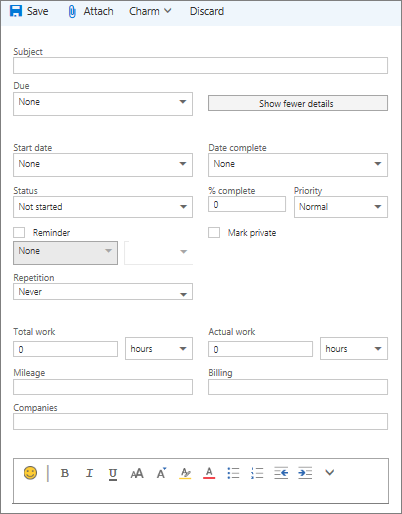
Select New.

-
Type the subject, due date, and if you like, a note about the task.
-
Select Show more details to enter information like Start date, Date complete, and Status and to track progress on the task such as % completed or hours worked.
-
Use the Attach command to attach a file to the task.
-
Use the Charm command to assign a charm to a task. Charms are icons you can apply to Task items as visual cues that help you quickly identify specific types of tasks.
-
Select Save.
-
Select Tasks at the bottom of the page.
-
Select the task you want to edit and then select Edit

-
Make the edits to the task and select Save.
-
Select Tasks at the bottom of the page.
-
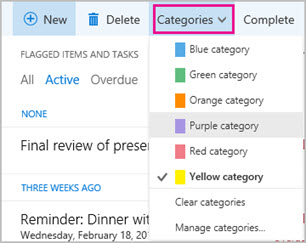
Select the task you want to categorize from the task list and then select Categories.
-
Select the category that you want to assign to the task, for example, Yellow category.
-
Select Tasks at the bottom of the page.
-
Select the Filter menu and choose how you want to sort the tasks in the task list. For example, in the following screenshot, tasks are sorted by status (Active), due date, and with the oldest tasks on top. You can sort by Active, Overdue, or Completed.

Note: Outlook on the web doesn't support sorting tasks by category.


