
What happened to the menus and toolbars? In Microsoft Project 2010, they have been replaced with the Ribbon, which helps you quickly find the commands that you need to complete a task. Commands are organized in logical groups that are collected together under tabs.
This document provides a broad overview of what you can find in each tab of the Ribbon, followed by a short example of how to use the Ribbon to perform a basic project management task. It also directs you to more detailed information on that task.
In this article
The Task tab
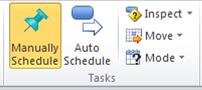
The Task tab provides buttons for adding, formatting, and working with tasks. From the Schedule group, you can mark the percentage complete, link tasks to one another, and inactivate a task. You can also convert manually scheduled tasks into automatically scheduled tasks from the Tasks group.
Sample use: Top-down scheduling
-
In the Gantt Chart view, add the summary task above the tasks you want to include in it.
-
Select the set of tasks that you want to place under a summary task.
-
On the Task tab, in the Schedule group, click the Indent button.

For a detailed description of top-down scheduling, see Top-down planning with summary tasks (or phases).
Sample use: User-controlled scheduling
-
In the Gantt Chart view, select one or more manually scheduled tasks.
-
On the Task tab, in the Tasks group, click Auto Schedule.
-
Project 2010 incorporates those tasks into the existing schedule.
For a full description of the manual and automatic scheduling options in Project 2010, see How Project schedules tasks: Behind the scenes.
The Resource tab
The buttons on the Resource tab help you with the often-complex business of managing the resources who do the work on your project. From this tab, you can add resources, assign them to tasks, and level resources that are overallocated. You can also launch the powerful team planner from this tab.
Sample use: Team planner
-
Open a project that has resources assigned to tasks.
-
On the Resource tab, in the View group, click Team Planner.

-
The team planner appears.
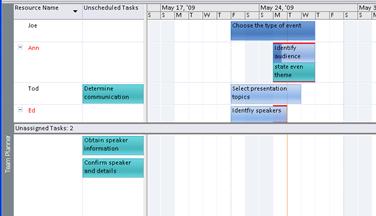
Now that the team planner is here, you probably want to know how to use it. Check out View your team's work with the Team Planner.
The Project tab
Use the Project tab to handle advanced project functions involving properties, scheduling, and reporting. For example, you can add custom fields, define WBS codes, insert subprojects, and generate visual reports from the Project tab.
Sample use: Set a baseline
-
From a Gantt Chart view, select the tasks that you want to include in your baseline plan. To set a baseline for the entire project, skip this step.
-
On the Project tab, in the Schedule group, click Set Baseline and then click Set Baseline again in the menu that appears.
-
In the Set Baseline dialog box, select the baseline and its parameters that you want to set.
For a detailed discussion about baselines, see Create or update a baseline or an interim plan.
The View tab
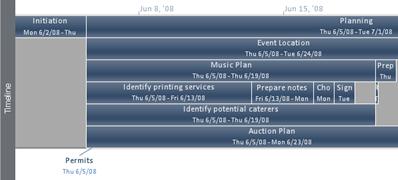
The View tab is a one-stop shop for selecting the various views available in Project 2010 and for customizing your current view. It is also where you can add a timeline to your view.
Sample use: Add a timeline to a view
-
Select any type of view.
-
On the View tab, in the Split View group, select the Timeline check box.
-
The timeline view appears beneath the Ribbon.
-
Click the Format tab to access options for customizing the timeline.
Note: You cannot select the Timeline and Details check boxes at the same time. You must choose one view or the other.
The Format tab
The Format tab buttons help you customize the text, columns, colors, and other elements of each type of view. The groups and buttons in the Format tab are completely different for each type of view. They change automatically when you change the view.
The following graphic shows the Format tab for a Gantt Chart view.
Sample use: Change the color of Gantt bars
-
On the View tab, in the Task Views group, click Gantt Chart.
-
On the Format tab, in the Gantt Chart Style group, click a style in the Gantt Chart Style list.
-
The colors of the Gantt bars for your entire project are instantly updated.
That's fairly easy! But there are many more ways that you can customize Gantt bars in addition to applying predefined styles. See Format the bar chart of a Gantt Chart view.


