
Using Modern Comments
The modern comments experience in Word sets the stage for richer collaboration by your team and aligns the commenting experience across the Office suite. With modern comments, you can leave thoughts or questions in the document for others, review and edit your comments before committing them, and @mention someone to invite them into the conversation.
Add a comment
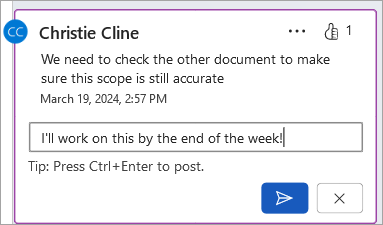
To add a new comment, follow these steps:
-
Select the text, image, table, etc. you want to comment on, and then do one of the following:
-
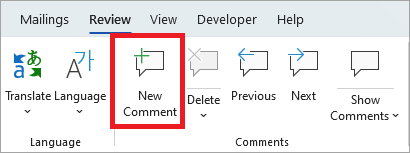
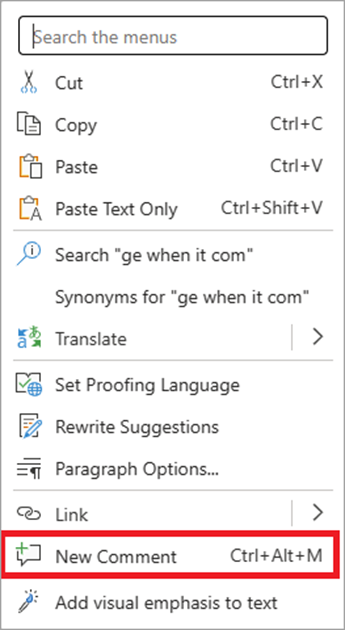
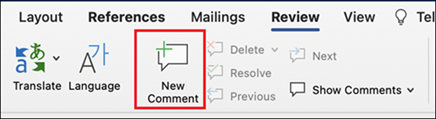
On the Review tab, select New Comment.
-
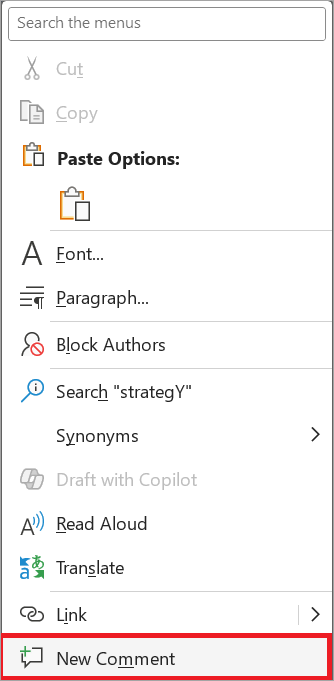
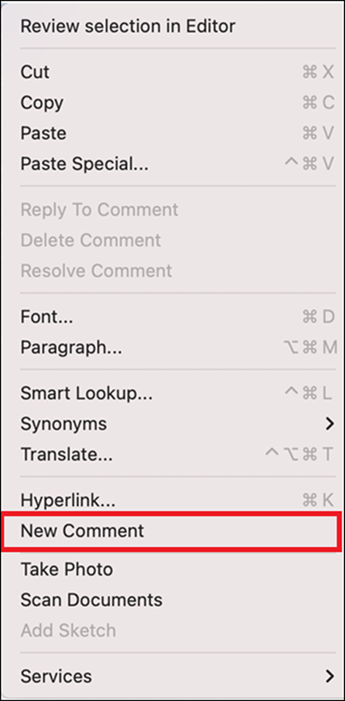
Right-click (or long-press) and select New Comment.
-
Use the keyboard shortcut Ctrl + Alt + M.
-
-
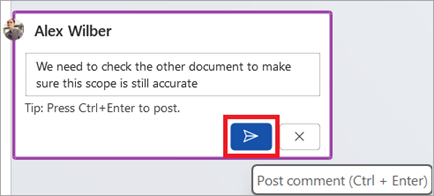
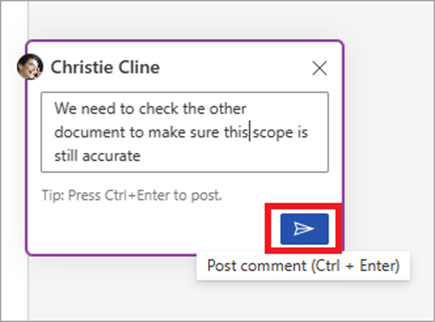
Select the Post comment button or Ctrl + Enter.
React to a comment
-
Select an existing comment or create a new comment and post it.
-
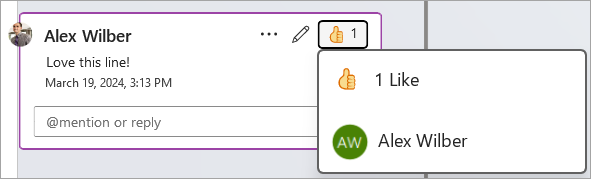
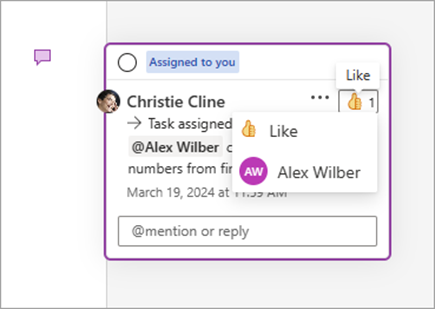
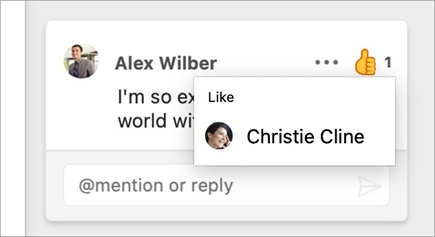
To react to a comment, select the Like button in the top right corner of the comment box.
-
To remove your reaction, simply select the Like button again.
-
To see who has reacted to a comment, hover over the Like button.
Reply to, edit, or resolve a comment
-
Select an existing comment.
-
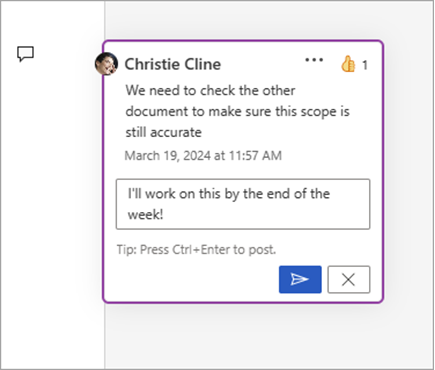
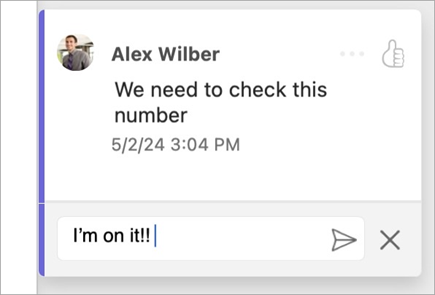
Select the reply box.
-
Type your reply.
-
Select the Post comment button or Ctrl + Enter to commit the comment.
-
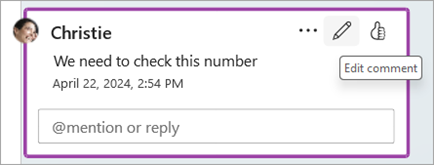
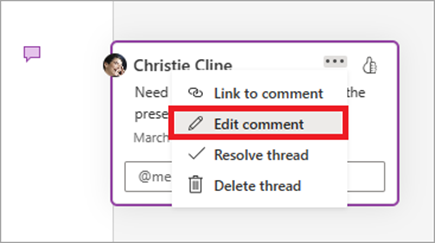
Select an existing comment.
-
Select the Edit comment button.
-
Make your changes.
-
Select the Post comment button or Ctrl + Enter to commit the edit.
-
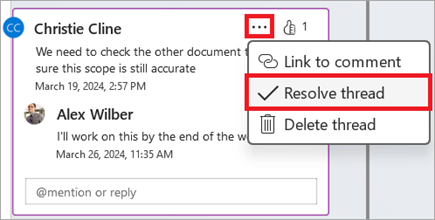
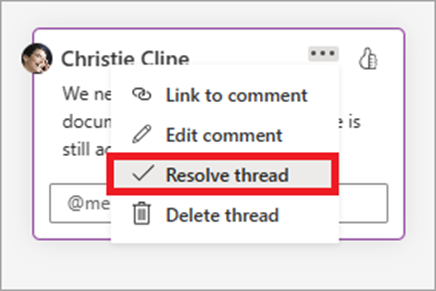
Select an existing comment.
-
In the comment, select the ellipsis ( … ).
-
Do one of the following:
-
Select the Delete thread button to delete the comment or comment thread.
-
Select Resolve thread to mark comment threads that have been addressed.
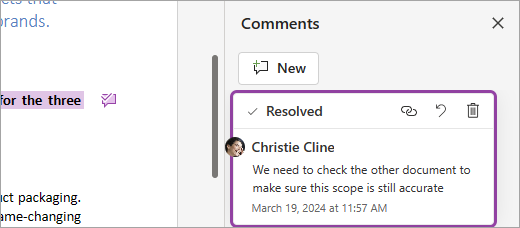
Note: Resolved comments will not appear in the Contextual view. You can view resolved comments in List view.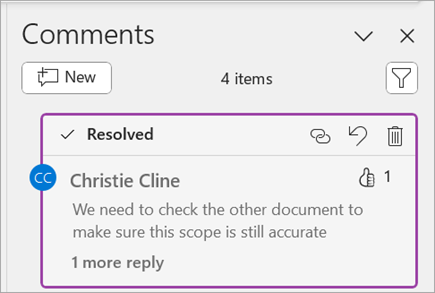
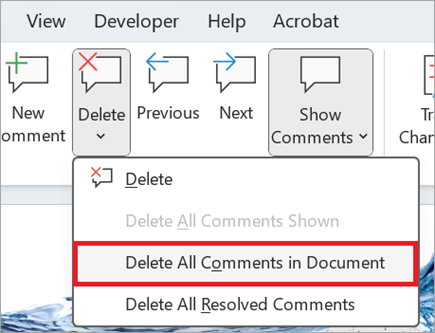
-
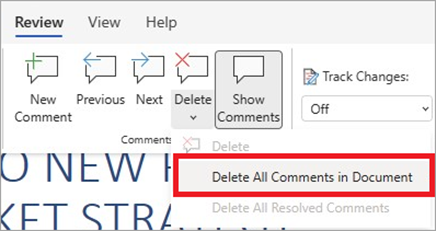
Open a document that contains comments.
-
Select the Review tab in the ribbon menu.
-
Under Delete , select Delete All Comments in Document.
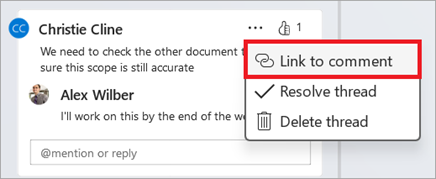
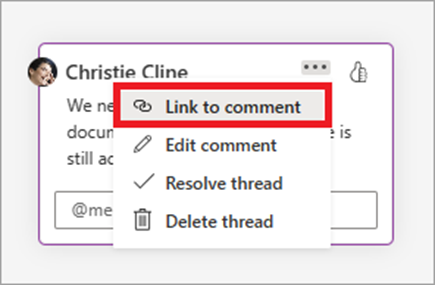
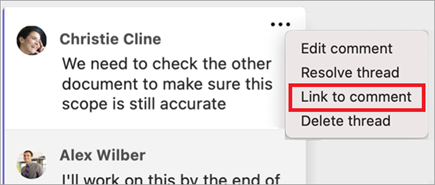
Link to a comment
-
Select an existing comment.
-
In the comment, select the ellipsis ( … ).
-
Select Link to comment.
-
Select Copy. Your link is now available to share.
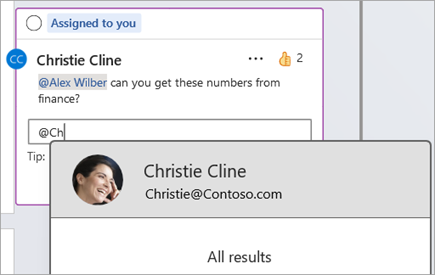
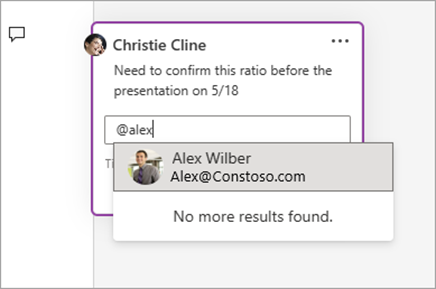
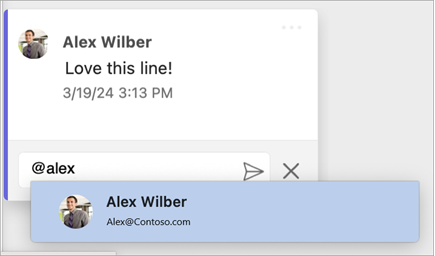
Use @mentions to tag someone or to assign a task
If you're an enterprise user working in a document saved to the cloud, you can use @mention to address a specific person in a comment or reply.
-
Type @ and the first few letters of the person's first or last name, and then pick the name you want.
-
Select the Post comment button. The person mentioned in the comment or reply will receive an email notification.
For more information about using @mentions, see the article Use @mention in comments to tag someone for feedback .
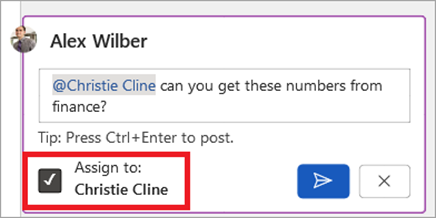
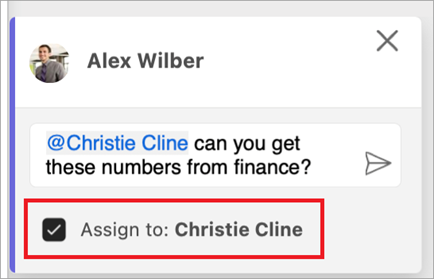
You can also use comments and @mention to assign a task.
-
Type @ and the first few letters of the person's first or last name, and then pick the name you want.
-
Select the Assign to checkbox to assign the comment as a task.
-
Select the Post comment button.
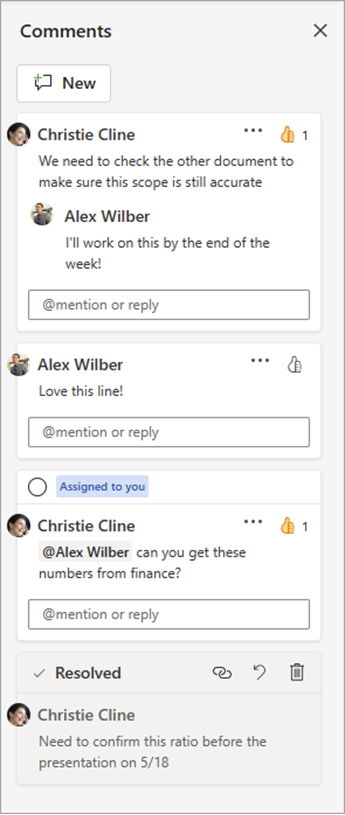
Two ways to view comments
Comments are shown in the Contextual View by default. When you add a comment in Word, you'll see it appear in the right margin as close to the insertion point in the text as possible. In this view, all active comments are visible in context on each page. This allows you to easily see comments alongside the associated content. When you select a comment, a border appears around it and its position is closer to the page.
The Contextual View hides all resolved comments so you can focus on active comments.
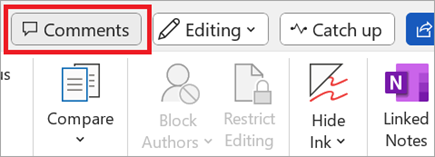
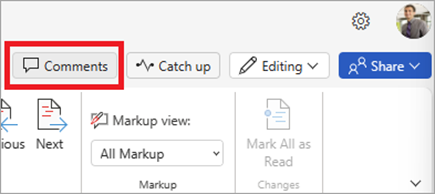
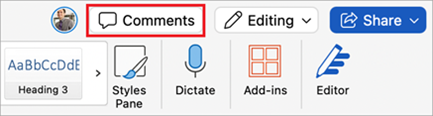
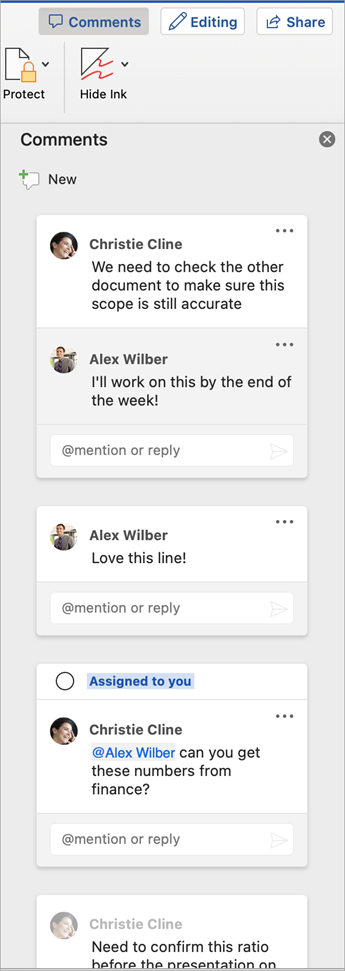
To view all comments, including all resolved comments, you can open the Comments pane to see the List View. Open the pane by selecting Comments in the right corner of the ribbon. This will switch from Contextual View to List View.
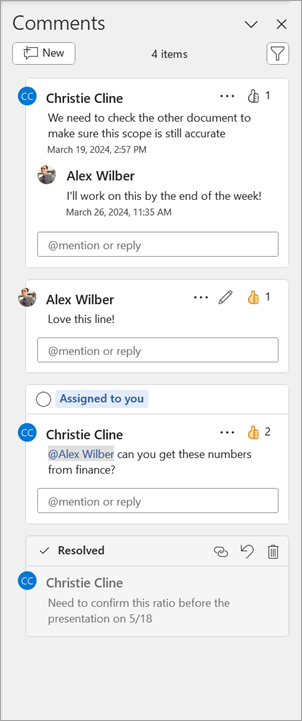
You can interact with comments in the List View the same as you would in the Contextual View. If you reopen a resolved comment, it will be visible again in Contextual View. The pane is useful for reviewing all comments at once without having to scroll through all the document’s pages.
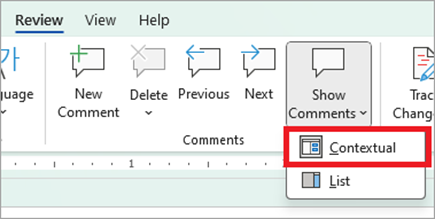
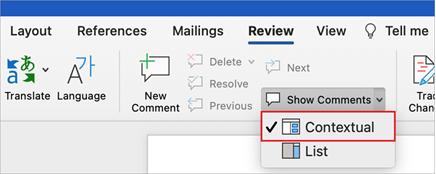
You can switch between the different views anytime by selecting Comments in the right corner of the ribbon, or in the Review tab using the drop-down menu in the Show Comments button.
Add a comment
To add a new comment, follow these steps:
-
Select the text, image, table, etc. you want to comment on, and then do one of the following:
-
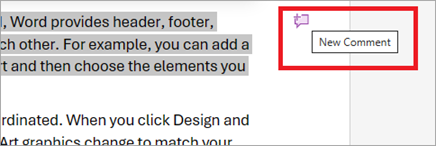
Select the New Comment icon in the margin.
-
Right-click (or long-press) the selection and select New Comment.
-
Use the keyboard shortcut Ctrl + Alt + M.
-
-
Select the Post comment button or Ctrl + Enter.
React to a comment
-
Select an existing comment or create a new comment and post it.
-
To react to a comment, select the Like button in the top right corner of the comment box.
-
To remove your reaction, simply select the Like button again.
-
To see who has reacted to a comment, hover over the Like button.
Reply to, edit, or resolve a comment
-
Select an existing comment.
-
Select the reply box.
-
Type your reply.
-
Select the Post comment button or Ctrl + Enter to commit the comment.
-
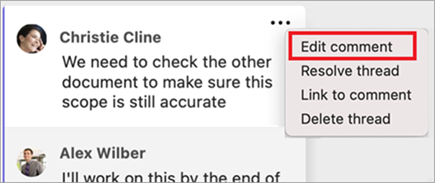
Select an existing comment.
-
Select the ellipsis ( ... ).
-
Select Edit comment.
-
Make your changes.
-
Select the Post comment button or Ctrl + Enter to commit the comment.
-
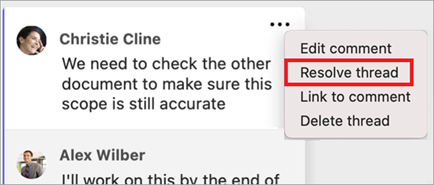
Select an existing comment.
-
In the comment, select the ellipsis ( … )
-
Do one of the following:
-
Select the Delete thread button to delete the comment or comment thread.
-
Select Resolve thread to mark comment threads that have been addressed.
Note: Resolved comments will not appear in the contextual view. You can view resolved comments in List view.
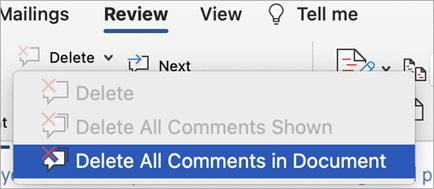
-
Open a document that contains comments.
-
Select the Review tab in the ribbon.
-
Under Delete, select Delete all comments in Document.
Link to a comment
-
Select an existing comment.
-
In the comment, select the ellipsis ( … ).
-
Select Link to comment.
-
Select Copy. Your link is now available to share.
Use @mentions to tag someone or to assign a task
If you're an enterprise user working in a document saved to the cloud, you can use @mention to address a specific person in a comment or reply.
-
Type @ and the first few letters of the person's first or last name, and then pick the name you want.
-
Select the Post comment button. The person mentioned in the comment or reply will receive an email notification.
For more information about using @mentions, see the article Use @mention in comments to tag someone for feedback.
You can also use comments and @mention to assign a task.
-
Type @ and the first few letters of the person's first or last name, and then pick the name you want.
-
Select the Assign to checkbox to assign the comment as a task.
-
Select the Post comment button.

Two ways to view comments
Comments are shown in the Contextual View by default. When you add a comment in Word, you'll see it appear in the right margin as close to the insertion point in the text as possible. In this view, all active comments are visible in context on each page. This allows you to easily see comments alongside the associated content. When you select a comment, a border appears around it and its position is closer to the page.
The Contextual View hides all resolved comments so you can focus on active comments.
To view all comments, including all resolved comments, you can open the Comments pane to see the List View. Open the pane by selecting Comments in the right corner of the ribbon. This will switch from Contextual View to List View.
You can interact with comments in the List View the same as you would in the Contextual View. If you reopen a resolved comment, it will be visible again in Contextual View. The pane is useful for reviewing all comments at once without having to scroll through all the document’s pages.
You can switch between the different views anytime by selecting Comments in the right corner of the ribbon, or in the Review tab using the Show Comments button.
Add a comment
To add a new comment, follow these steps:
-
Select the text, image, table, etc. you want to comment on, and then do one of the following:
-
On the Review tab, select New Comment.
-
Right-click (or long-press) and select New Comment.
-
Use the keyboard shortcut Cmd + Alt + M.
2. Select the Post comment button or Cmd + Enter.
React to a comment
-
Select an existing comment or create a new comment and post it.
-
To react to a comment, select the Like button in the top right corner of the comment box.
-
To remove your reaction, simply select the Like button again.
-
To see who has reacted to a comment, hover over the Like button.
Reply to, edit, or resolve a comment
-
Select an existing comment.
-
Select the reply box.
-
Type your reply.
-
Select the Post comment button or Cmd + Enter to commit the comment.
-
Select an existing comment.
-
Select the Edit comment button.
-
Make your changes.
-
Select the Post comment button or Cmd + Enter to commit the edit.
-
Select an existing comment.
-
In the comment, select the ellipsis ( … ).
-
Do one of the following:
-
Select the Delete thread button to delete the comment or comment thread.
-
Select Resolve thread to mark comment threads that have been addressed.
Note: Resolved comments will not appear in the Contextual view. You can view resolved comments in List view.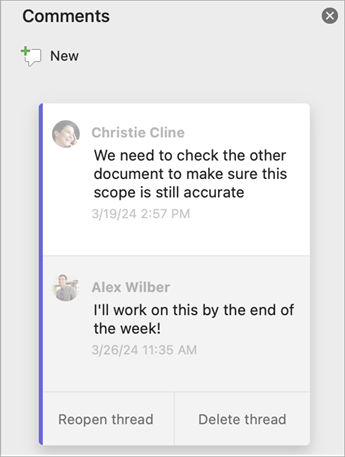
-
Open a document that contains comments.
-
Select the Review tab in the ribbon.
-
Under Delete , select Delete all comments in Document .
Link to a comment
-
Select an existing comment.
-
In the comment, select the ellipsis ( … ).
-
Select Link to comment.
-
Select Copy. Your link is now available to share.
Use @mentions to tag someone or to assign a task
If you're an enterprise user working in a document saved to the cloud, you can use @mention to address a specific person in a comment or reply.
-
Type @ and the first few letters of the person's first or last name, and then pick the name you want.
-
Select the Post comment button. The person mentioned in the comment or reply will receive an email notification.
For more information about using @mentions, see the article Use @mention in comments to tag someone for feedback .
You can also use comments and @mention to assign a task.
-
Type @ and the first few letters of the person's first or last name, and then pick the name you want.
-
Select the Assign to checkbox to assign the comment as a task.
-
Select the Post comment button.
Two ways to view comments
Comments are shown in the Contextual View by default. When you add a comment in Word, you'll see it appear in the right margin as close to the insertion point in the text as possible. In this view, all active comments are visible in context on each page. This allows you to easily see comments alongside the associated content. When you select a comment, a border appears around it and its position is closer to the page.
The Contextual View hides all resolved comments so you can focus on active comments.
To view all comments, including all resolved comments, you can open the Comments pane to see the List View. Open the pane by selecting Comments in the right corner of the ribbon. This will switch from Contextual View to List View.
You can interact with comments in the List View the same as you would in the Contextual View. If you reopen a resolved comment, it will be visible again in Contextual View. The pane is useful for reviewing all comments at once without having to scroll through all the document’s pages.
You can switch between the different views anytime by selecting Comments in the right corner of the ribbon, or in the Review tab using the drop-down menu in the Show Comments button.


Need more help?
Want more options?
Explore subscription benefits, browse training courses, learn how to secure your device, and more.


Communities help you ask and answer questions, give feedback, and hear from experts with rich knowledge.


