
When managing a project in Project for the web, you can export your project to Excel. Having your project data in an Excel file allows you to:
-
Send a file containing project details to external stakeholders
-
Create reports and visuals
-
Archive copies of your project data for audit and compliance
-
Print copies of your project
Here's how to export your project:
-
Go to project.microsoft.com and open the project you want to export to Excel.
-
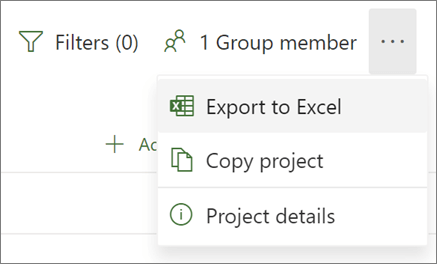
In the top right corner, select the three dots (...), then select Export to Excel.
-
When you see the message "All done! We've exported [your project name]." at the bottom of the screen, you can look for your new Excel file where you store your downloads.
When you open the Excel file containing your project, you'll see a tab called "Project tasks" that contains a summary of project-wide information at the top, including its name, project manager, and the start and finish dates, duration, and percent complete for the whole project. You'll also see what date it was exported. Under that, you'll see a table of all the information for your project.
While Project desktop has many built-in reports that let you present all sorts of project data to your stakeholders, you can also export your project data to Excel for in-depth data analysis and visual reporting. In Excel, you can create PivotTable reports, charts, and use many other features that help you create a more visual report.
You’ll have to map your project data for proper arrangement in Excel, but the Export Wizard will guide you along the way.
-
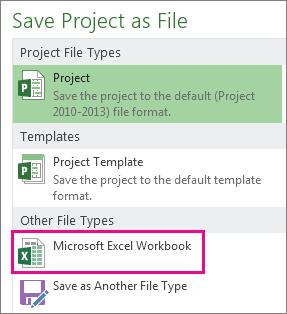
Choose File > Export > Save Project as File, and under Other File Types, double-click Microsoft Excel Workbook.
-
In the Save As dialog box, pick a location for the workbook.
-
In the File name box, type the name you want, and choose Save.
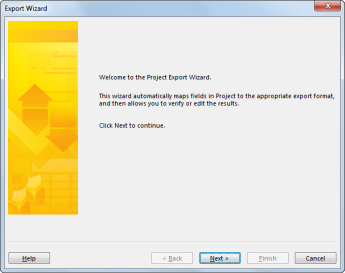
The Export Wizard appears.
-
Choose Next to get started.
-
On the Data step, choose Selected Data, if it’s not already selected.
-
On the Map step, choose New map to create your own data settings for mapping your data from Project fields to appropriate Excel fields.
To use a predefined or previously defined map, choose Use existing map, and then pick the map you want to use.
-
On the Map Options step, pick the types of data you are exporting and the options you want.
-
On the Task Mapping, Resource Mapping, or Assignment Mapping steps, edit any mapping assumptions Project made, and enter any new mapping fields:
-
In the From column, type or select a Project field, and then press Enter.
-
Use the buttons below the mapping table to insert or remove rows or apply a Project table for mapping.
-
Use the Move buttons to rearrange fields.
-
Under Preview, verify the layout of your export map.
-
-
If needed, pick a specific export filter in the Export filter box.
-
Choose Next.
-
On the End of Map Definition step, choose Save Map if you want to use it again, and type a name in the Map name box. The new map will be added to the list of predefined maps.
-
Click Finish.
To view your exported project data, open the workbook in Excel.
Work with your project data in Excel
After you open your workbook in Excel, you might notice that some data didn’t come in quite as you expected. No problem! In Excel, you can use Flash Fill to quickly clean up columns of data, for example to change numbers to dates, or text to numbers.
Then you can analyze and format your data to create the visual reports you want:


