
Add-ins provide optional commands and features for Microsoft Excel. By default, add-ins are not immediately available in Excel, so you must first install and (in some cases) activate these add-ins so that you can use them.
Are you looking for information about Office Add-ins based on HTML, CSS, and JS? If you are, see Get an Office Add-in for Excel.
Some add-ins are built in to Excel, such as Solver and the Analysis ToolPak. Other add-ins are available from the Download Center and must first be downloaded and installed. Finally, there are add-ins that are created by third parties, such as a programmer in your organization or a software solution provider. These can be Component Object Model (COM) add-ins, Visual Basic for Applications (VBA) add-ins, and DLL add-ins. These add-ins must also be installed to use them.
Most add-ins can be categorized into three different types:
-
Excel add-ins These typically include Excel add-in (.xlam), Excel 97-2003 add-in (.xla), or DLL add-in (.xll) files or they are automation add-ins. Some Excel add-ins, such as Solver and the Analysis ToolPak, may be available after you install Excel or Microsoft Office. Typically, you only need to activate these add-ins to use them.
-
Downloadable add-ins Additional add-ins for Excel can be downloaded and installed from Downloads at Office.com.
-
Custom add-ins Developers and solution providers usually design custom Component Object Model (COM) add-ins, automation add-ins, VBA add-ins, and XLL add-ins. These must be installed for you to use them.
After you have installed or activated an add-in, the add-in and its commands may be available in one of the following locations:
-
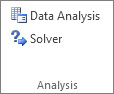
Data tab. After you install and activate the Analysis ToolPak and Solver add-ins, the Data Analysis and Solver commands are available in the Analysis group.
-
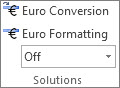
Formulas tab. After you install and activate the Euro Currency Tools, the Euro Conversion and Euro Formatting commands are displayed in the Solutions group.
-
Add-Ins tab. Other add-ins may be added to the Add-Ins tab. This tab is added to the ribbon when you install and activate the first add-in that is shown in the Add-Ins tab. If you don't see the Add-Ins tab, you should exit and then restart Excel.
Other add-ins, such as the Get Started tab, are available in other places in Excel, such as a tab on the ribbon, or through macros or customized menus.
Important: If you are a software developer, you can use this procedure to install or remove an automation program before you design installation and removal programs for your add-in.
To activate an Excel add-in
-
Click File > Get Add-ins.
Alternatively, you can click Home > Add-ins.

-
You can directly install add-ins from this page or select More Add-ins to explore.
-
In the Office Add-ins, dialog select My Add-ins tab.
-
Select the add-in you wish to activate and right click to see option to activate.
If you cannot find the add-in that you want to activate in the Office Add-Ins box, you may need to install it.
To install an Excel add-in
-
To install an add-in that is typically installed with Excel, such as Solver or the Analysis ToolPak, run the setup program for Excel or Microsoft Office and choose the Change option to install the add-in. After you restart Excel, the add-in should appear in the Add-Ins available box.
-
Some Excel add-ins are located on your computer and can be installed or activated by clicking Browse (in the Add-Ins dialog box) to locate the add-in, and then clicking OK.
-
Some Excel add-ins require running an installation package. You may need to download or copy the installation package to your computer (an installation package is typically a file with an .msi file name extension), and then run it.
-
Other add-ins that are not available on your computer can be downloaded and installed through a Web browser from Downloads or from other sites on the Internet or a server in your organization. Follow the setup instructions for the download as needed.
To inactivate an Excel add-in
-
Click File > Get Add-ins.
Alternatively, you can click Home > Add-ins.
-
You can directly install add-ins from this page or select More Add-ins to explore.
-
In the Office Add-ins, dialog select My Add-ins tab.
-
Select the add-in you wish to inactivate and right click to see options to inactivate.
Note: Inactivating an add-in does not remove the add-in from your computer. To remove the add-in from your computer, you must uninstall it.
To remove an Excel add-in
Important: If you originally installed the Excel add-in from a network file server or from a shared folder, you might need to remove the add-in from that location. If you installed the Excel add-in from a CD and you mapped your CD drive to a new drive letter after installing the add-in, you need to reinstall the add-in from the CD. If you are running any Excel add-ins from the CD, you must uninstall the Excel add-ins, and then reinstall them from the CD.
-
Click the File tab, and then click Exit.
-
In Control Panel, click Programs and Features (Windows 7 and Windows Vista) or Add/Remove Programs (Windows XP).
-
Do one of the following:
-
If you installed Excel as part of Microsoft Office, click Microsoft Office in the list of installed programs, and then click the Change button.
-
If you installed Excel individually, click the name of your program in the list of installed programs, and then click the Change button.
-
If you installed the add-in from the Download Center, click the name of your program in the list of installed programs, and then click the Uninstall button.
-
-
Follow the instructions in the installation program.
Important: If you are a software developer, you can use this procedure to install or remove an automation program before you design installation and removal programs for your add-in. If you are not a developer, you should not need to use this procedure. Contact the system administrator who provided the add-in if you want installation and removal instructions.
Add a COM add-in
-
Click the File tab, click Options, and then click the Add-Ins category.
-
In the Manage box, click COM Add-ins, and then click Go.
The COM Add-Ins dialog box appears.
-
In the Add-Ins available box, select the check box next to the add-in that you want to install, and then click OK.
Tip If the add-in that you want to use is not listed in the Add-Ins available box, click Add, and then locate the add-in.
Remove a COM add-in
-
Click the File tab, click Options, and then click the Add-Ins category.
-
In the Manage box, click COM Add-ins, and then click Go.
The COM Add-Ins dialog box appears.
-
In the Add-Ins available box, clear the check box next to the add-in that you want to remove, and then click OK.
Note This removes the add-in from memory but keeps its name in the list of available add-ins. It does not delete the add-in from your computer.
-
To remove a COM add-in from the list of available add-ins and to delete the add-in from your computer, click its name in the Add-ins available box, and then click Remove.
Note: If you are a software developer, you can use this procedure to install or remove an automation program before you design installation and removal programs for your add-in. If you are not a developer, you should not need to use this procedure. Contact the system administrator who provided the add-in if you want installation and removal instructions.
-
Click the File tab, click Options, and then click the Add-Ins category.
-
In the Manage box, click Excel Add-ins, and then click Go.
The Add-Ins dialog box appears.
-
To install an automation add-in, in the Automation servers available box, click Automation, and then click the add-in that you want.
Tip If the add-in that you want isn't in the list, click Browse, locate the add-in, and then click OK.
-
To remove an automation add-in, you must remove it from the registry. See your system administrator for details.
Some add-ins are built in to Excel, such as Solver and the Analysis ToolPak. Other add-ins are available from the Download Center and must first be downloaded and installed. Finally, there are add-ins that are created by third parties, such as a programmer in your organization or a software solution provider. These can be Component Object Model (COM) add-ins, Visual Basic for Applications (VBA) add-ins, and DLL add-ins. These add-ins must also be installed to use them.
Most add-ins can be categorized into three different types:
-
Excel add-ins These typically include Excel add-in (.xlam), Excel 97-2003 add-in (.xla), or DLL add-in (.xll) files or they are automation add-ins. Some Excel add-ins, such as Solver and the Analysis ToolPak, may be available after you install Excel or Microsoft Office. Typically, you only need to activate these add-ins to use them.
-
Downloadable add-ins Additional add-ins for Excel can be downloaded and installed from Downloads at Office.com.
-
Custom add-ins Developers and solution providers usually design custom Component Object Model (COM) add-ins, automation add-ins, VBA add-ins, and XLL add-ins. These must be installed for you to use them.
After you have installed or activated an add-in, the add-in and its commands may be available in one of the following locations:
-
Data tab. After you install and activate the Analysis ToolPak and Solver add-ins, the Data Analysis and Solver commands are available in the Data tab on the ribbon.
-
Home tab. Other add-ins may be added to the Home tab.
Other add-ins, such as the Get Started tab, are available in other places in Excel, such as a tab on the ribbon, or through macros or customized menus.
Important: If you are a software developer, you can use this procedure to install or remove an automation program before you design installation and removal programs for your add-in.
To activate a pre-installed Excel add-in
-
On the Tools menu, select Add-ins.
-
In the Add-Ins available box, select the check box for the Add-in you want to activate, and then click OK.
To install an Excel add-in
-
Some Excel add-ins are located on your computer and can be installed or activated by clicking Browse (in the Add-Ins dialog box above) to locate the add-in, and then clicking OK.
-
Some Excel add-ins require running an installation package. You may need to download or copy the installation package to your computer (an installation package is typically a file with an .msi file name extension), and then run it.
-
Other add-ins that are not available on your computer can be downloaded and installed through a Web browser from Downloads or from other sites on the Internet, a server in your organization, , or using the built-in Store option in Excel. Follow the setup instructions for the download as needed.
To install Add-ins from the Store
-
Click the Insert tab in the ribbon.
-
Click the Store button.
-
Use the Categories or Search field to find Add-ins.
-
Click Add to install the Add-in.
Note: Some Add-ins need to be purchased.
-
To remove an Excel add-in
-
Click the Insert tab, and then click My Add-ins.
-
In Office Add-ins, click the 3 dots menu next to the Add-in.
-
Click Remove.
-
Read the notice that appears regarding other devices and click Remove.


