Sign in with Microsoft
Sign in or create an account.
Hello,
Select a different account.
You have multiple accounts
Choose the account you want to sign in with.

To make room for more information in a table, you can add rows and columns without leaving Word for the web.

  1. First, if you’re in Reading View, click Edit Document > Edit in Word for the web.

  2. Click anywhere in the table that you want to change. You’ll see Table Tools appear above the ribbon.
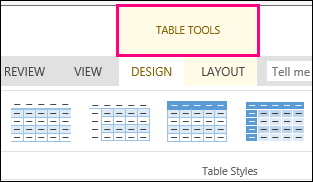
    Image of Table Tools command that appears at the top of the ribbon when you click anywhere in a table.

  3. Under Table Tools, click Layout. This opens options for inserting rows and columns, plus other table options.
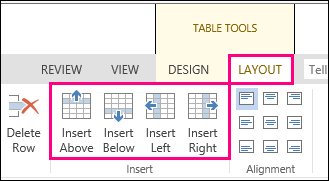
    Image of layout options for adding rows and columns in tables

  4. Put your cursor wherever in the table you want to add a column or row.

    • To insert a row, click Insert Above or Insert Below.

    • To insert a column, click Insert Left or Insert Right.

Tip: If you also want to change the look of your table, check out the options on the Table Tools > Design tab.

Need more help?

Want more options?

Explore subscription benefits, browse training courses, learn how to secure your device, and more.

Communities help you ask and answer questions, give feedback, and hear from experts with rich knowledge.

Was this information helpful?

What affected your experience?
By pressing submit, your feedback will be used to improve Microsoft products and services. Your IT admin will be able to collect this data. Privacy Statement.

Thank you for your feedback!

×