
In Word for Mac, you can choose a predefined paper size from a list and change the paper size for all pages in your document, for a specific page, or for a specific section. You can also change the default paper size used for new documents.
When you create a new document, Word applies the default paper size and margins that are stored in a template (normal.dotm). If you frequently use a paper size that differs from the default size (for example, US Legal), you can set new defaults that Word uses when you create a new document. If your current document is set up with the margins that you want, you can use this document to set your new default margins.
In Word 2016 for Mac, you can also create a custom paper size and you can choose different paper sources for pages in your document. Choosing different paper trays allows you to use different paper for your first page, which could be a different color or heavier weight than the other pages.
-
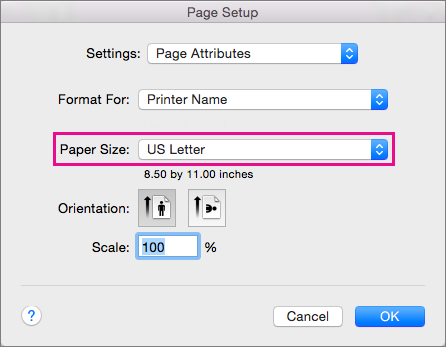
On the File menu, click Page Setup.
-
In Page Setup, select a size from the Paper Size list.
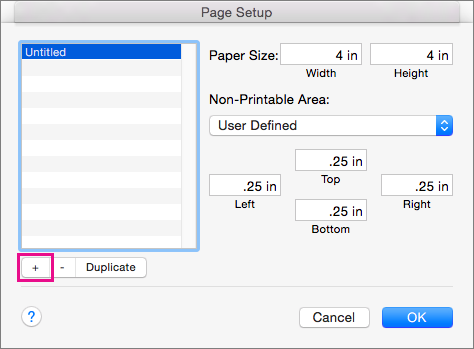
If you select Manage Custom Sizes from the list, you can define a custom paper size; click the plus sign to create a new paper definition, and then enter sizes for width, height, and non-printable area.
-
When you have finished selecting your paper size, click OK.
-
Select the text on the pages that you want to change.
-
On the Format menu, click Document > Page Setup.
-
Select a paper size from the Paper Size list, and then click OK.
-
On the Document page, on the Apply to list, click Selected text, and then click OK.
Word inserts section breaks as needed before and after the text that you selected and changes the paper size for that section.
-
On the View menu, click Print Layout.
-
To display nonprinting characters, such as paragraph markers (¶), click Show all nonprinting characters

-
Select the section break for the section that you want to change.
-
On the Format menu, point to Document, and then click Page Setup.
-
On the Paper Size list, select a paper size and then click OK.
-
On the Apply to list, click Selected sections.
-
On the Format menu, click Document.
-
Click Default, and then click Yes.
Note: If you change the preferred paper size or margins for the template that Word bases new documents on (normal.dotm), all future documents that use the normal.dotm template use the new settings. If you change the preferred paper size or margins for a document that is based on another template, only new documents that are based on that template use the new settings.
Choose a paper source for your document's first page, and then for all subsequent pages. The list of available sources is provided by the printer driver on your computer and may be different from those shown here.
If a page source is set to Auto Select, Word will automatically choose a paper source based on the size of the page and the information about paper sizes provided by your printer driver.
-
On the File menu, click Print.
-
In Print, select Paper Feed.
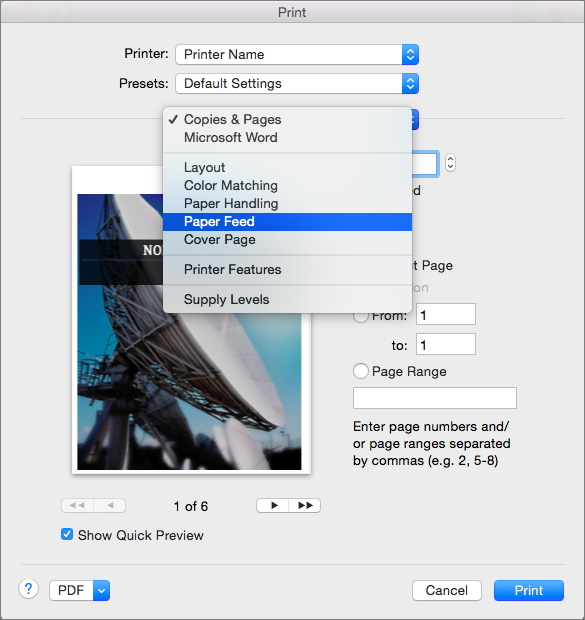
Word displays Paper Feed settings.

-
To specify a paper source for the first page in your document, select First Page From, and then select a source from the First Page From list.
-
To change the paper source for all pages in your document after the first page, select a source in the Remaining From list.
-
If you are ready to print, click Print.
Otherwise, change Paper Feed to another category of settings to make additional changes.
-
On the Format menu, click Document.
-
Click Page Setup.
-
On the Paper Size pop-up menu, select a paper size.
-
Click OK.
-
On the Apply to pop-up menu, click Whole document, and then click OK.
-
Select the text on the pages that you want to change.
-
On the Format menu, click Document.
-
Click Page Setup.
-
On the Paper Size pop-up menu, select a paper size.
-
Click OK.
-
On the Apply to pop-up menu, click Selected text, and then click OK.
Word inserts section break as needed before and after the text that you selected and changes the paper size for that section.
-
On the View menu, click Print Layout.
-
To display nonprinting characters, such as paragraph markers (¶), click Show all nonprinting characters
-
Select the section break for the sections that you want to change.
-
On the Format menu, point to Document, and then click Page Setup.
-
On the Paper Size pop-up menu, select a paper size.
-
Click OK.
-
On the Apply to pop-up menu, click Selected sections.
-
On the Format menu, click Document.
-
Click Default, and then click Yes.
Note: If you change the preferred paper size or margins for the template that Word bases new documents on (normal.dotm), all future documents that use the normal.dotm template use the new settings. If you change the preferred paper size or margins for a document that is based on another template, only new documents that are based on that template use the new settings.


